I have gotten countless number of feedback from persons willing to setup a custom domain name for their empower network. Mapping your empower network blog to use a custom domain name is imperative considering also the recent penalty from Google.
This is something anyone can easily setup within seconds, just follow my guides carefully and see your blog running on a custom domain name within few minutes.
Getting Set for the Sub-domain name mapping
- Purchase a domain name from any domain name registrar of your choice
- Log in to your empower network admin dashboard
- Tap on the small arrow at the top right corner of the dashboard (Just below your profile pix) and click on view/edit blog
- Click on the small + sign that appears on the left (Same as customize your blog)
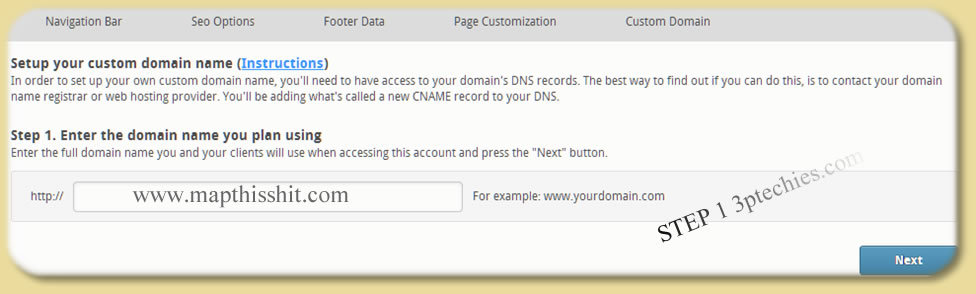
- From the tabs where you have; Navigation bar, SEO options, Footer Data, Page Customization and Custom Domain – Click on the Custom Domain tab
- Enter your Full domain name (the one you intend using for your empower network blog) in the next dialog box that appears – eg. www.myblogurl.com, blog.mynewurl.com or just myblogurl.com depending on what domain you want mapped.

- Click next after the value shows it’s available
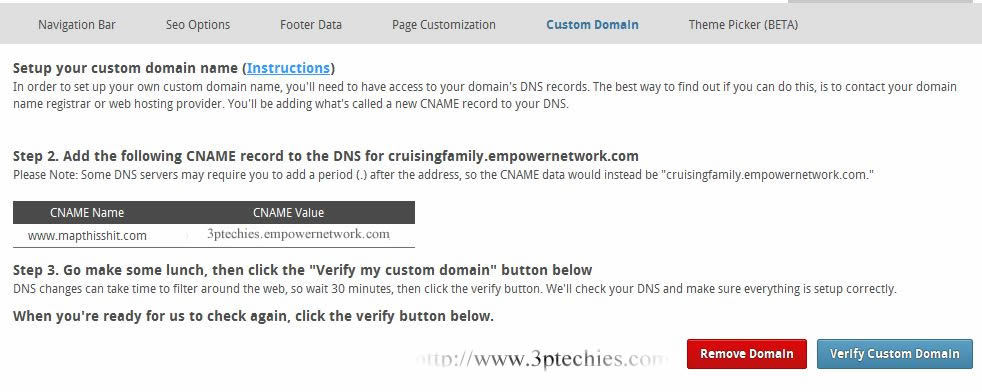
- From the completed steps above, your CNAME and CNAME Values must have been generated – Take note of it
Now lets proceed to the second part that appears to be a little bit technical for a regular user.
For GoDaddy Users
If you purchased your domain name from GoDaddy, the following steps below should be able to guide you towards having your empower network blog mapped to any domain name of your choice.
This method also applies to any other domain name registrar that provides DNS and advance DNS tools.
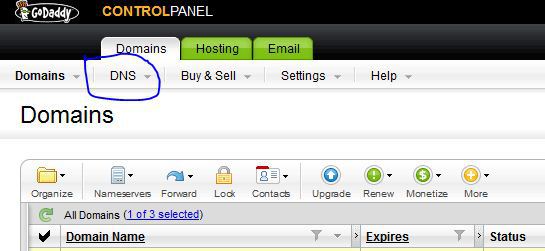
- Log in to your GoDaddy account management dashboard
- From products menu, hover over “Domains” to unveil the “domain manager” (below; where you have manage now)
- Select the domain name you intend using and click on “Edit Zone”
- Create a “CNAME record” using the values provided to you in the first part of this tutorial
 Using the pix above as an example; It is assumed that I have purchased http://www.mapthishit.com and has entered it as my required domain value in the image labelled step 1 above. So my corresponding CNAME and CNAME values will be;
CNAME = www, blog and etc.
CNAME Value = 3ptechies.empowernetwork.com (The value provided by them)
- Choose I hr for the TTL value
- Save Zone and exit
- Click the verify Custom Domain button to make sure that all your settings is correct
Your site should be loading from the custom domain name in few minutes or hours.
For Cpanel Users
This should guide those using domain name from bluehost, hostgator, arvixe, atspace, site5 and the rest of them. The steps for doing the setup isn’t any complicated, all you need do is;
- Log in to your website cpanel
- From domains panel ==> Locate Advanced DNS Zone Editor
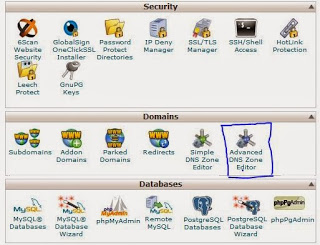
- Select the domain name you intend using from the drop-down list
- Create a “CNAME” record to point to the values provided to you in the previous steps
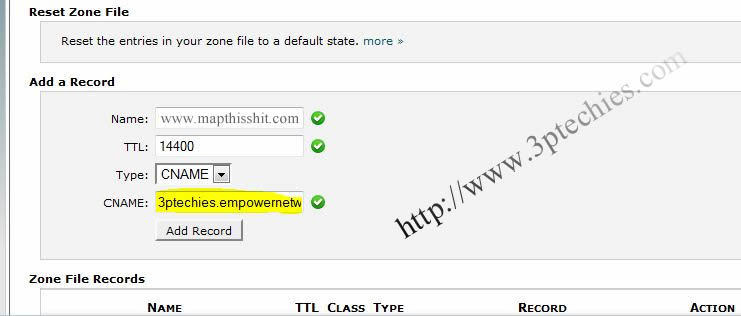
- Tap the “Add Record” button to save your settings
- Click the verify Custom Domain button to make sure that all your settings is correct
Feel free to ask me questions, also share with your friends.


")


