We’ve got a ray of hope for those of you who’ve accidentally deleted pictures from your Windows 7 computer. Whether intentional or not, if you’ve deleted precious pictures from your Windows 7 machine, USB stick or digital camera, you might think there’s little chance of recovering them. Well, you’re mistaken and this mistake has a happy ending!
What most users are unaware of is that when a picture gets deleted from a computer, camera or memory stick, only the link to it actually gets deleted. The data stays back until something new is overwritten on it. So if you act quickly, you can save the day by reclaiming all your deleted photos. Read on to know how!
Common mistakes users make
During the course of our regular activities on the computer, often a careless Select All + Delete operation causes unexpected damage. Documents or important photos that we don’t intend to delete are lost in an instant. Though Windows tries to prevent extensive damage through the Recycle Bin functionality where deleted photos are held for some time, this utility cannot protect you in the case of memory sticks or external drives or a Shift + Delete operation.
Another way in which photos can be lost is formatting the Windows 7 hard drive without taking proper backup of your files. Unplanned drive format wipes the drive clean and can land you up in personal as well as professional trouble.
How then can one bounce back from photo loss on a Windows 7 machine?
How to recover deleted pictures on Windows 7
If you can’t locate or access a photo that you accidentally deleted on your Windows 7 machine, there are several ways to recover it:
Restoring pictures from the Recycle Bin
If you’ve not permanently deleted photos through a Shift + Delete operation and are not looking for them on external media but your own Windows 7 machine, recovering them is pretty simple.
- Double-click on the Recycle Bin icon on the Desktop. A window will open displaying all files and folders within the Recycle Bin.
- Select the pictures you want to restore.
- Right-click and select “Restore” from the pop-up menu that opens
This will restore the pictures to their original location on your computer.
Restoring pictures from a backup
Backups act as life-savers in the most dire of situations. If your photos are backed up externally, you can easily regain them from the backup. If you’ve backed up using Windows backup, here are the steps to restore your photos:
- Connect the drive on which the backup is stored to your Windows 7 machine.
- Go to Start -> Control Panel -> System and Maintenance and click on Backup and Restore.
- Click on “Restore my files” and then follow the instructions.
Having backups of important photos and documents is always advisable. If you have proper intelligent backups, you can never actually lose any of your data.
Read: How to secure sdcard and Usb Pendrive with a password
Restoring from the file’s previous versions
If unfortunately you’ve not backed up your photos, you can try to reclaim them from their previous versions. A file’s previous version is its copy that Windows automatically saves as part of a System Restore point (system image in time to which the computer can be restored if facing problems). To achieve this, follow the below mentioned steps:
- Go to Start -> Computer.
- Locate the folder which originally contained the pictures. Physically navigate to that folder rather than trying to work with the library.
- Right-click on the folder and click on “Restore previous versions” from the pop-up menu that opens. This is also applicable to photos stored on the uppermost directory level, i.e directly saved on the drive for example, C:\. In such case, right click on the drive itself and then click on “Restore previous versions”.
- A list of all available versions of that folder will be shown including Windows backup versions as well as System Restore points. Select the version you wish to restore and double-click on it.
- Drag the folder you want to restore to the location where you want to place it (the Desktop or another folder maybe).
This will restore the photos to the location at which you dragged the folder.
Restoring photos via a utility software
The above techniques are great for recovering deleted photos from any Windows 7 computer or backup. However, when it comes to memory cards or USBs, you’ll need something more sophisticated. Some brilliant automated tools are available online dedicated to the task of recovering deleted photos from any Windows based media as well as external drives, memory cards and USB sticks.
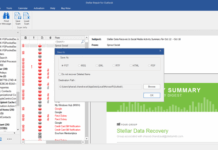
Tools from Stellar Phoenix are pretty good at scanning your memory cards or USB or the large size hard drive and bring your media files in reasonable time. You can also find long list of 20 best recovery software for Smartphones, Mac and Windows OS (Includes both Free and Paid).
Final Words
Regardless of what led to the deletion of photos, with the above mentioned techniques you can easily recover your lost photos in no time.
