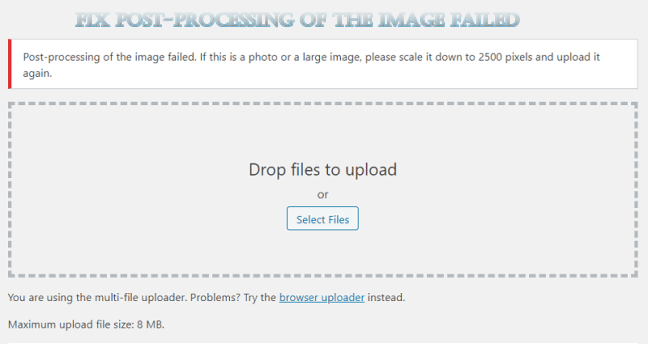
“Post-processing of the image failed. If this is a photo or a large image, please scale it down to 2500 pixels and upload it again” is a new WordPress bug that’s mostly experienced by some users who recently upgraded to WordPress 5.3.X. Two new WordPress versions have gone without addressing the issue as it’s mostly experienced by a fewer number of users.
Whatever the case may be, these ten tips would help you troubleshoot and fix the Post-processing of the image failed error while uploading images in WordPress 5.3.X.
Understanding the Image Upload Time-out Error
When we upgrade our system OS or an application’s software version, we expect to get a better experience as a result of the update: This is because every upgrade/update is expected to work better than the previous version of that app, software, or OS. The same is applicable to WordPress CMS.
Regularly, you will see a clear notification at the top of your WP admin panel urging you to upgrade your WordPress version to the most recent one, and each WordPress upgrade is expected to fix the bugs and errors discovered on its predecessor. Currently, the latest version of WordPress is v5.3.x, and it seems to have the post-processing of the image failed error (for some users) when uploading images that are large.
The 10 ways to fix Post-processing of the image failed in WordPress
Most of these methods are quick and easy methods and as such won’t take you much time to complete. However, before discussing the possible solutions to this error, let’s get to know why you might be seeing the error message.
According to the error message, the image you are trying to upload is probably higher than 2500px, which is the maximum resolution for images that are allowed on your WordPress install. Maybe a simple trick of scaling down the image to <2500px would help?
Let’s see as I take you through these popular solutions for post-processing of the image failed WordPress bug.
First Method: Clear Cache
First things first, and as awkward as it may sound, you need to clear your browser’s cache. This simple act can help in some cases, especially when you have previously met this error and got it fixed, only to return again to meet the same error; who knows, it may be a cache issue.
However, if after clearing your cache and the error still shows up, then you should try the other methods below. Remember to clear your server and WordPress cache (for those who are using a WordPress cache plugin) as well.
Second Method: Re-Scale the Image
You can check the image resolution to see if it’s actually above 2500 pixels. If the image is above 2500 pixels, then make it to be less than 2500px and try re-uploading again. Images above 2500 pixels are indicated as big-size images, and most times, you’ll have issues uploading them on WP.
Another good option is to convert the image to another format before uploading it. For example, you can convert the large image from .PNG to .JPG or use a lossless image compression service like tinypng.com to reduce the image size without losing its quality.
Third Method (Exclusive to Nginx users)
This method has worked for a couple of people who use Nginx, and thus, we believe it will work for you. Simply increase the client_max_body_size to 100M or 200M, or any other max_size that’s higher than the default one that’s set by your host.
Fourth Method: Check the Image Filename
Sometimes this error will appear as a result of a special character present in the image filename; check for an apostrophe(‘) and/or other special characters and remove them. After you have crosschecked the filename, you can try to re-upload the image.
Fifth Method: Using the Image Threshold Plugin or the Custom PHP Code
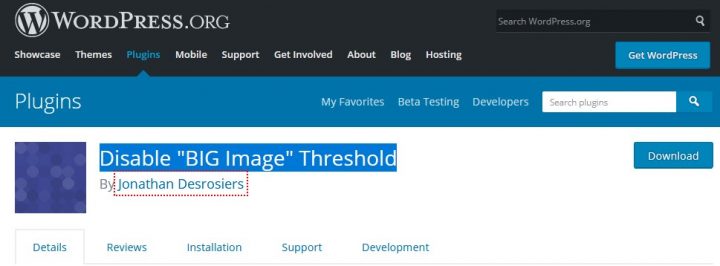
The Disable “BIG Image” Threshold plugin for WordPress sites has received quite a lot of good reviews from webmasters. It has proven to be a foolproof utility plugin that lets you upload “Big Image” or “Large Image” by disabling the threshold on your functions.php file. You can download the plugin from here and click on the activate button to use this workaround.
Another way to get this same result without using a plugin is by modifying your theme’s function.php code. The code to add to your theme’s function.php file is provided below for your use.
Note: This is an advanced method, and if not done properly, you may end up breaking the entire website. If you’re familiar with PHP scripts, you can head over to the “theme editor” option, locate and open the functions.php file, and write the PHP code below in it. Save the file and reupload the problematic image.
add_filter( ‘big_image_size_threshold’, ‘__return_false’ );
Sixth Method: Modify your Theme’s Function.php File
This is another advanced method to resolve the post-processing of the image failed problem in WordPress. It tells WordPress to use GD instead of ImageMagick. To use this method, edit your theme’s function.php file, ==> paste this PHP code and save the file to complete the fix.
use_gd_editor($array) {
	return array( 'WP_Image_Editor_GD', );
}
add_filter( 'wp_image_editors', 'use_gd_editor' );
Seventh Method: Try Uploading to WP Media Library
Try uploading the image through the media library if you haven’t done that yet. This was the solution that worked for quite a lot of other webmasters that have faced this issue. If this method doesn’t work for you, try out other ones.
Eight Method: Change Theme and/or Disable Plugins
Did you just activate a new plugin on the site? If so, then you should deactivate the plugin and try uploading the image again. Also, if you changed the website theme and started getting this error message, maybe you should switch to another theme.
Ninth Method: A Little Tweak on cPanel
Some webmasters have identified that one could fix this error by downgrading to PHP 7.1 and then activate “mbstring” in cPanel. If you’re already on PHP7.1 or later version, simply enable the “mbstring.” To do this, go to the PHP menu and tick the checkbox beside mbstring.
Tenth Method: Return to an Older Version of WordPress or PHP

Finally, if you can’t fix this error by following the methods above, maybe you should rollback the update and return to a previous version of WordPress.
You can also downgrade your PHP version from 7.3 to 7.2 or earlier. Either way, this is my final suggestion on how to fix the post-processing of the image failed error in WordPress. Feel free to share other methods in the comments section below.
Summary:
The post-processing of the image failed in WordPress was discovered on WP v5.3. Hopefully, WordPress will fix this problem in later versions. But in the meantime, these ten (10) tips are expected to help you out. Cheers!


Thank you so much for sharing such a nice and in-depth content about WordPress issues we generally face and the resolution for those issues. It is very helpful for many people.
Downgrading PhP to version 7.1 resolve the issue for WP 5.6 (December 2020)
thanks a lot.. that was an amazing guide.. it worked for me, flawlessly!
Thanks a lot for this pro WP tips. You saved my time!
Thanks so much! I’ve read so many forums, and nothing mentioned something so simple as changing the image to another format. A simple switch from png to jpg saved me so much hassle. Thank you!
11th Method: check and confirm that you don’t have a Web Application Firewall which is blocking file uploads. e.g., based on Content-Length
Thank you very much for this detailed information on fixing WP errors. You really saved me a lot of time.