Wondering how to make a face-swapping video without a lengthy learning curve? Here’s a quick guide to making a face swap video on Dzine AI. With this step-by-step AI Face Swap Video tutorial, you can creatively increase your productivity by over 70%.
A Quick Overview

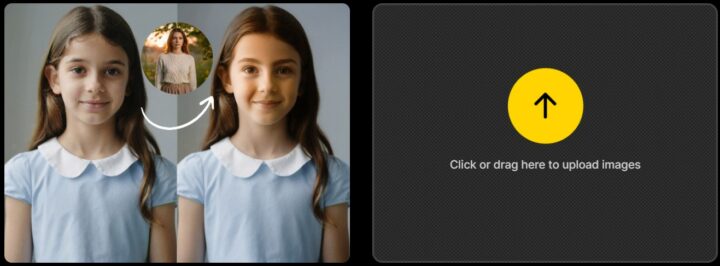
A good face swap video does not need a complicated workflow. Dzine AI is an all-in-one platform for visual creation, and it makes video edits like this feel approachable even if you are not a professional editor.
With Dzine, you can create an AI face swap video by uploading your clip, adding a clean reference image, writing a focused prompt, and generating a result you can refine in a couple of passes.
This tutorial shows the exact steps in the Dzine Video Editor, plus tips and troubleshooting to improve realism.
Before you start (quality and responsible use)
Use face swapping responsibly. Only use videos and photos you have permission to use, and avoid edits that impersonate or mislead. If the swap could be mistaken for a real recording, label it.
For realism, inputs matter most. When angle and lighting match, face alignment is easier, blending edges looks cleaner, and you get less flicker from frame to frame.
What you need to prepare
Start with a short original video (10–20 seconds) with decent lighting, a steady camera, and a face that stays visible. Avoid fast turns, motion blur, and heavy occlusion (hands, hair, microphones) because those frames commonly cause drifting and cut-out edges.
Choose a reference image that is sharp around the eyes and mouth, has minimal filters, and roughly matches the video’s angle and lighting. Keep a second reference image ready as a backup because changing the image can fix problems faster than rewriting the prompt.
Step-by-step Guide on Making an AI face swap video in Dzine

Here’s the detailed guide on how to make an AI face swap video in Dzine AI using the provided tools and prompts:
Step 1: Open Dzine and go to Video Editor
Open Dzine and enter the Dzine Video Editor from your dashboard. If you prefer to start from the dedicated tool page, use the AI face swap video link. Confirm you are in the video workspace and can see where to upload a clip and a reference image.
Step 2: Upload the original video
Upload original video footage and preview it once before generating. Check that the subject’s face is visible in most frames and that lighting does not swing dramatically. If the clip includes long sections with the face turned away, trim to the cleanest segment first to improve consistency.
Step 3: Upload the reference image
Upload your reference image and do a quick quality check: sharpness, similar angle, and no heavy beauty filters. If your clip is a three-quarter view, a three-quarter reference image often works better than a perfectly front-facing photo.
Step 4: Enter a prompt (copy-ready prompt included)
Use prompts to describe the outcome you want (realistic, stable, seamless) rather than micromanaging details.
Main prompt:
Create a realistic face swap video using the provided reference image. Keep accurate face alignment, consistent identity across frames, natural skin texture, and clean blending edges at the jawline and hairline. Match the original lighting and preserve overall sharpness.
Optional add-on for speaking clips:
If the subject is talking, keep lip movement natural and stable, and avoid teeth warping or mouth drifting.
Step 5: Generate and review the output
Click generate and watch the result at full speed, then pause on problem frames. Inspect the hairline and jawline for blending edges, check lighting match in shadows, and scan for flicker across similar frames. If something looks wrong, change one variable (trim, reference image, or prompt) and generate again.
Tips to get higher quality results
Match the lighting first
Lighting mismatch is the most common reason a swap looks pasted on. Pick a reference image with similar exposure and shadow direction when possible, and reinforce “match original lighting” in your prompt when it is not.
Reduce occlusion and stabilize motion
When landmarks are hidden, results become unstable. Trim moments where hands cover the face or hair blocks the cheek, and start with the steadiest portion of the clip to improve consistency.
Improve blending edges (jawline and hairline)
Edge issues are usually more noticeable than minor texture problems. Keep the prompt focused on seamless blending edges, especially around hairline wisps and jaw contours.
Keep identity consistent across frames
If the face subtly changes every few seconds, viewers notice. Use a high-quality reference image, avoid clips with frequent angle shifts, and include “consistent identity across frames” in the prompt.
Export settings that keep quality
Compression can exaggerate outlines around the hairline. Export at the highest reasonable quality first, then let the platform compress.
Troubleshooting common problems
Face drifting or sliding
Drifting usually means difficult angles, occlusion, or a reference image that does not match. Trim to clearer frames, try a closer-angle reference image, and reinforce “accurate face alignment” in the prompt.
Flicker frame to frame
Trim around unstable lighting transitions and add “frame-to-frame consistency” to the prompt. If flicker persists, replace the reference image with one that matches the scene lighting better.
Unnatural mouth or teeth
For talking clips, use the speaking add-on line and choose a segment with less motion blur around the mouth. A neutral-expression reference image can also help.
Blurry or over-smoothed skin
Add “preserve natural texture” and “avoid excessive smoothing.” If your source video is low resolution, prioritize clean edges and consistency over artificial sharpness.
Visible cut-out edges
Use a better-matched reference image and include “seamless edge blending, no visible boundary, no haloing near hairline” in the prompt, then regenerate.
When to use multi-person swaps
If your clip includes two or more people, single-face workflows can switch identities during quick interactions. In those cases, use multiple Face Swap Video so each subject stays mapped consistently.
Practical use cases
Creators use an AI face swap video for skits and concept tests (with clear labeling when needed). Marketers use a face swap video to prototype creative variations before a full production.
For personal edits, it is a practical way to learn how lighting and export settings affect realism.
Wrapping it all up:
You now have a repeatable workflow for how to make face swap video edits in Dzine: Video Editor → upload original video → upload reference image → enter the prompt → generate, then review and refine. Start with a short clip, focus on lighting match and blending edges, and you will get an AI face swap video that looks cleaner and more consistent in fewer tries.
Some FAQs
Start with 10–20 seconds so you can test face alignment and consistency quickly.
A sharp reference image with a similar angle and lighting to your original video, with minimal filters.
A few iterations are typical. Make one change, then generate again.
Because the reference image and clip have different exposure or shadow direction. Choose a closer match and emphasize lighting match in your prompt.
Yes. Multi-person workflows help keep identity consistent. If you are searching “make face swap video online free,” start with short clips and clean reference images so you can compare results quickly.


