 I wrote my very first article on how to increase the internal storage of Samsung Galaxy Y Duos long time ago when I was still using it.
Today, I have decided to make an improved post on same topic to extend the help to others who might be using other models of android phone and devices.
Low memory notification is like an epidemic and has become so synonymous with low end brands like Huawei, ZTE, Tecno, Gionee, Infinix and even most low end Samsung and HTC phones.
Android as an operating system needs a lot of internal storage to accommodate the many application and/or games the users graves for.
This tutorial should help you resolve low internal memory issues as well as create room for you to install other necessary applications without being bordered with the low internal storage of your phone.
Tools Needed for a Successful Operation
Since there’s no way we can actually increase the very internal memory that came with the phone, we are going to be using part of our external SD card to complement the one that came with our phone.
Under listed are the required steps and/or tools for this action to be completed successfully without errors.
- Your android phone must be rooted (See How to root any android phone or devices)
- Your external sdcard must be 2GB and above
- You must have a memory card reader ( can also use USB modems and memory card adapters)
- A computer with MiniTool Partition Wizard installed
How to Perform the Internal Memory Increase
Now that you have gotten all the tools ready, it is time to go ahead to the real stuff “increasing the internal memory of your android phone or device”.
Follow the following steps carefully to avoid any form of error.
Part A
Preparation
- Download root checker app from Google play store to confirm that your phone is already rooted
- Remove the sdcard (memory card) from your phone and attach it to the card reader or adapter
- Connect the card reader (with the sdcard attached) to the computer and backup all your files by ==> Right click on the sdcard ==> Select copy ==> Paste on any chosen folder of your choice.
- Confirm the drive letter of your memory card in the computer and take note of it (Usually F: in most modern laptops with double HDD partitions)
Part B
Partitioning your Micro SD Card with the MiniTool Partition Wizard Software
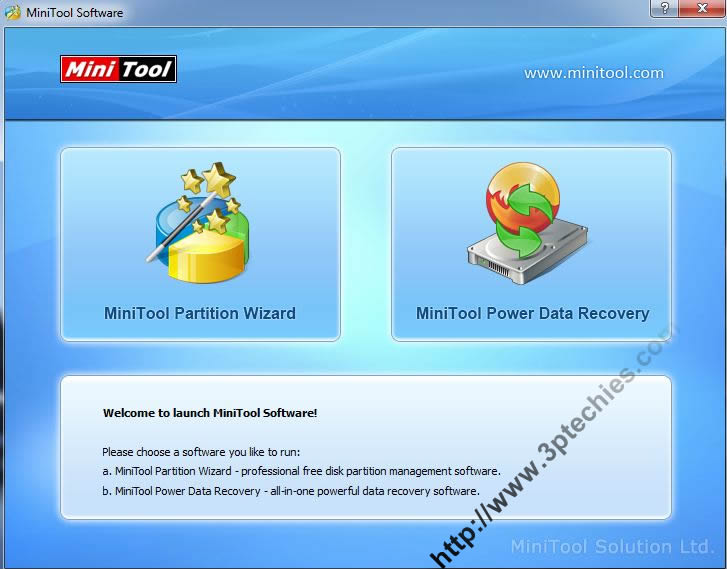
- With your memory card already connected ==> Launch the MiniTool Partition Wizard Software from your start menu or desktop
- Select MiniTool Partition Wizard from the first welcome screen
- From the list of storage devices displayed ==> Right click on your Micro SD card and select delete (Your memory card should be identified by the name or drive letter eg. Removable disk, f: etc.)
- After the delete action ==> Your memory card will be displaying as unallocated
- Right click on your memory card again and select create. A pop-up box will open giving you options for making partition
- Select the partition as primary and file system as FAT (if your memory card is less than 4GB) or FAT32 (if your SD Card is more than 4GB).
- Leave out about 480MB or more space (Depending on how much space you intend adding to your internal storage) for creating the next partition.
- Select done and ==> right-click on the unallocated space again and ==> select create as primary ==> and choose file system as EXT2 ==> use all the remaining drive space for this very partition.
- Select ok and ==> Locate apply changes from the top menu and click on it.
- Wait for the process to finish and then ==> restore your files back to the very first partition (the FAT or FAT32) you created as the EXT2 one will be used as an internal memory by your android device.
Part C
The Real Deal and Automation
This is the easiest part of this whole experiment (tweak and tricks), as we are going to need only few steps to get the whole stuff completed and placed on automation.
- Insert your memory card back to your phone
- Download and Install Link2sd app from Google Play
- Launch the Link2sd app and ==> select ext2 as the file system of your second partition when prompted.
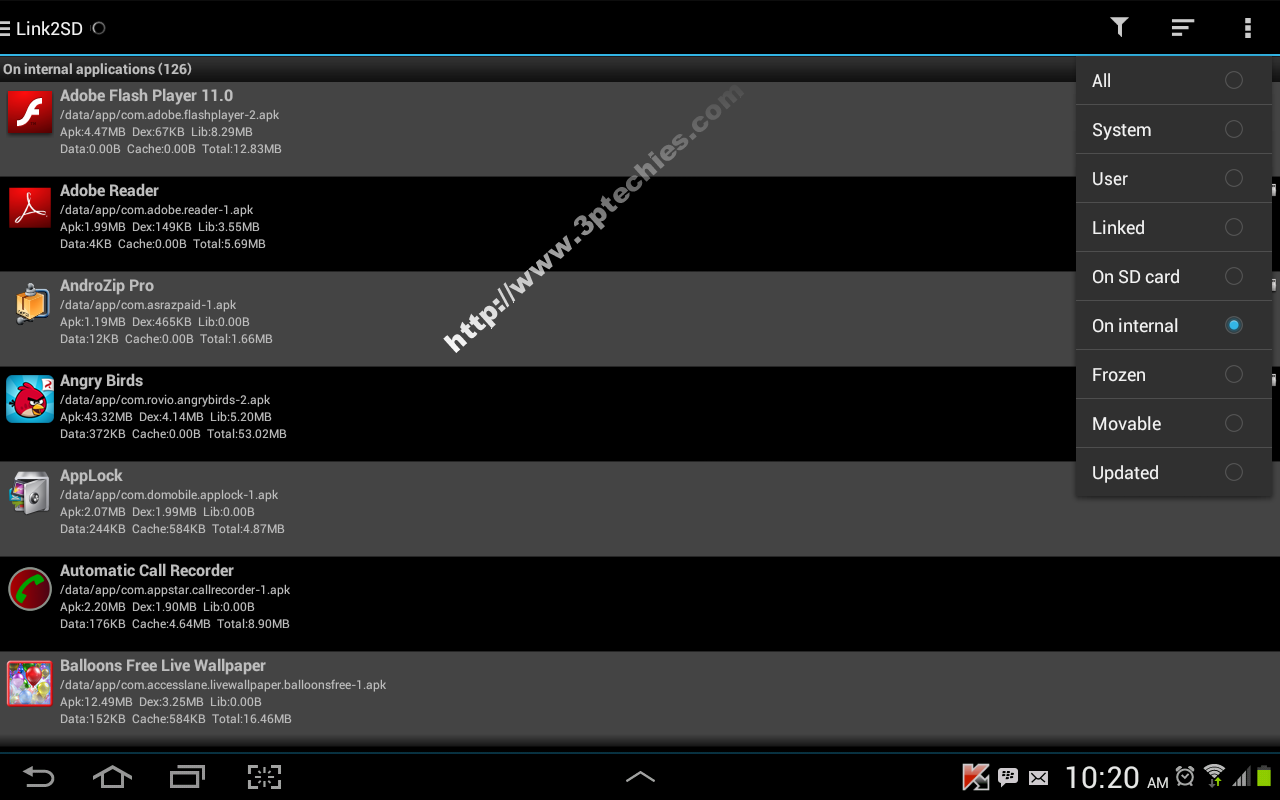
- From the application top right menu ==> tap the tube-like icon (as seen in the pix above) and ==> select internal
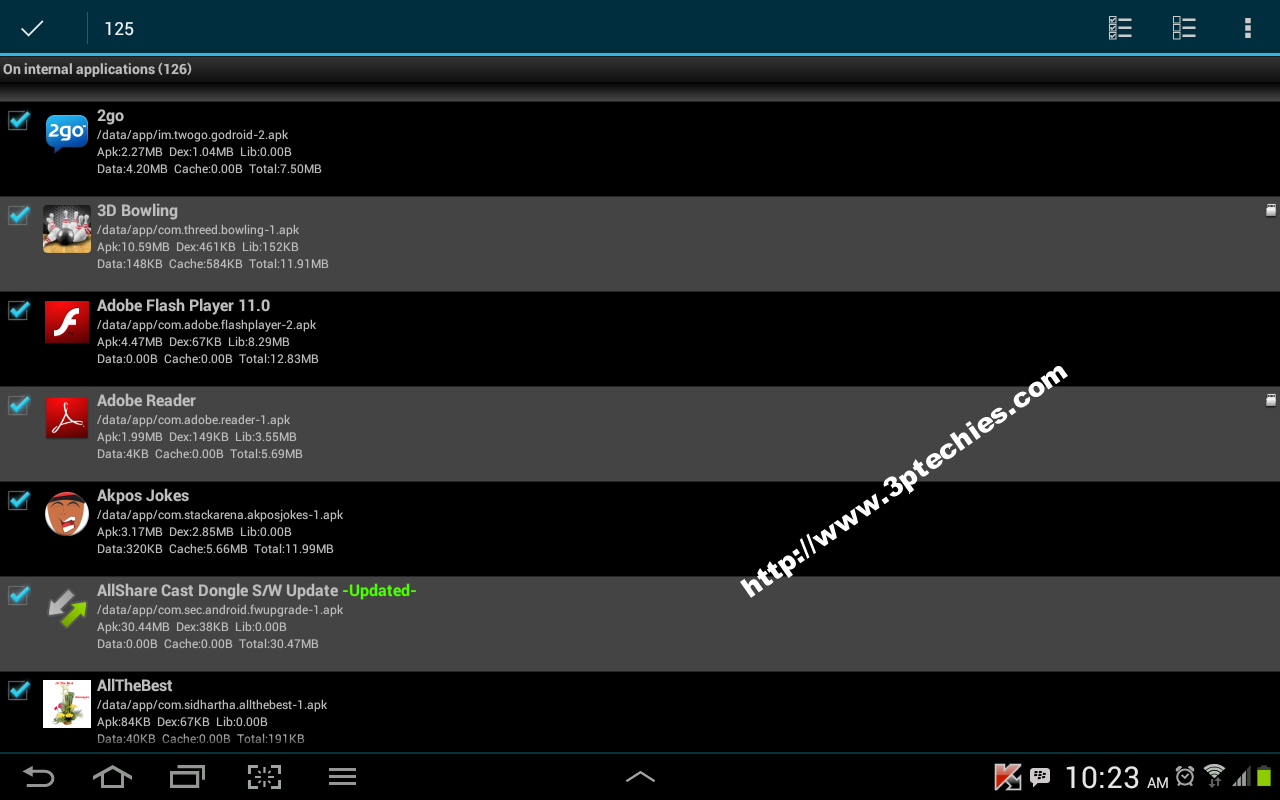
- Select all listed application using the multi-select option (as seen in the pix below)

- Tap on the “vertically aligned triple dot” icon on the top right menu to unveil the option key and ==> select create link
- Leave all the selected actions (ie; link application file, link library files, etc.) and ==> click OK when done.
- Tap on the option key again and ==> select settings
- Navigate to AUTO LINK and ==> check all the boxes there
- Locate Native APPS2SD Settings and ==> change your install location to External
Now you‘ve got it all set and properly automated. Do not forget to allow super user access when prompted by the system.
Update! August 2015.
How to Increase Internal Memory of Android & Stop the Annoying Low Memory Storage Warnings Without a PC
With the influx of low-end android devices in today’s mobile market, the need for this guide became necessary as low memory warning, lags, storage errors and the likes has become synonymous with some low-end android devices.
The difference between this updated section and the MiniTool guide is that while that of MiniTool requires you to use a computer, this part doesn’t need a computer and/or any external media.
Tools Needed
To correct the low storage warning on your device without a PC, you’ll need the following:
- A rooted android phone (Your phone must be rooted already. See how to root android W/O a PC)
- ROEHSOFT RAM Expander (SWAP)
- A free storage space on your SD card (4GB and above with about 800MB+free storage space recommended)
How to Increase Internal Memory & Stop the Insufficient RAM Bug
- Google ROEHSOFT RAM Expander Pro (SWAP)
- Install the App from the APK file
- Give Root Permission and Select your language
- Use the SWAP FILE Slider and select the amount of partition you want (150-300MB recommended)
- Use SWAPPINESS Slider: By setting the swappiness value, you can control the behavior of the kernel, the higher the value the more is outsourced
- Tick AUTO RUN and SWAP ACTIVE and it will take some time creating the needed SWAP file according to the size you have selected from the options above
Hurray! The Insufficient RAM & Low storage warning is gone for life.
Drop your opinion if there’s any difficulty with the updated and/or earlier version of this guide.
Featured Comment:


After partition , does it now, show increase in internal memory??? I have 8gb internal memory but after 2nd partition of 10gb of the sd card, it still shows 8gb internal memory.
It doesn’t literally increase your phone’s internal storage memory (hardware), but creates another virtual internal memory for apps/app data install.
Xolo q600s
Hi!
I’m having an issue. Link2sd constantly tells me:
“Some external data and obb folders have not been bound during boot time. Would you like to rebind these folders?”
2 times in a row. If I tap on “Rebind all external folders”, I get the message “Found no folders to bind”.
What now? This popup comes up every time and gets very annoying.
Hi Vyas,
What device model is that?
thank you =) next time i buy a mobile i will keep this in mind lol
10″ tablet, made in china
brand: Double Power (DoPo)
model no. DPM1081
it being off-brand is what has caused me to procrastinate in my task :P
I doubt there will be manual rooting method for this model Earthling.
After getting started, i found pretty large security risk in 1-click-root apps… like vroot. cant find any sure sources, and im reconsidering the whole thing. All the info i am finding on the subject of 1-click-root apps is posted in 2014 or older…
i will look for a guide to manually root, later. or i would appreciate if someone would be kind and link me to an easy-to-understand walkthrough for manual rooting :)
What model of phone is that?
wow thanks a ton, very glad to stumble on this. i will try it within the next 2 weeks. personally will be very nice to edit files that are on the SD card… and i can fix mom’s low memory issue for mothers day :D
Good to know Earthling,
Do have a lovely week ahead.
its just a trick,,,,,nothing increase in realty,,,,just show
I need help with a Tablet, it has an internel storage of 16GiB in what i think is a chip soldered to mainboard, it has a really lot partitions and a space configuration i hate, for System onlu 512MiB, for Data only 512MiB and 13GiB in a FAT32, it also has a slot for a MicroSd on one side, but the card when inserted is one milimiter out, so any touch and the card is expulsed with by a relly big force, i tested with a MicroSD very old and it flies away arround 5 meters, so it render unusable that slot, just a soft touch on that side and the card is ejected 5 meters away of the tablet (tested with the tablet on the wood floor at home).
I had tried to resize that 13GiB internal FAT32 to reduce it to multiple values and create on the rest an Ext2 (also tried with Ext3 and Ext4)… well, from console on the Tablet i can use both of them, but as soon as i reboot (or power off and on) the tablet say the /sdcard is damaged and reformat it as a 13GiB FAT32.
Why no one has developed a “loopmount” that allows to use a Ext2 filesystem file hosted on a file (less than 4GiB) tored on a Fat32 as that “second” partition, so Link2SD can use it? Or better a loopmount of N files in Big Raid configuration, so 2 or more files stored on a FAT32 can be mounted using loop devices.
I tested (for having a Linux distro) the loop mount concept, also tested the Big Raid (File0.dat + File1.dat + … FileN.dat) and i could have a Ext4 of 12GiB for such loop mount, having 4 files of 3 GiB on the Fat32 partition, it is mounted as a Big Raid and inside that loop mount there is a Ext4, it is used to store all Linux ARM system that runs in parallel to Arm Android.
Why Link2SD does not offer that option? At boot, do the loop mount and then recreate the links!
My tablet has something i hate: at boot it checks all partition scheme, and if it is not the one it wants, it recreates it and reformat them, loosing all data but not apps installed (if /system and /data are not modified, if touched all apps, updates, etc are also lost)… ah, yes, it is rooted (it cost me a lot of time to figure how to rooted, since i did not want to brick it by using 3rd party tools, i do in in usb remote console by manually remounting /system in RW and putting su, then i upgrade that root to a modern one very easy, since i had a first su, so now the su binaries and busybox, and superuser, etc are up to date).
All actions on computer had been done from Linux SolidK… no windows at all, it is easier since no drivers needed… worst, for my tablet there are no drivers for windows (tried more than one hundred and no one works) and neither is any Android update release from seller, etc… no stock upgrade availeble, can not install any custom rom, etc… sorry i do not put seller name (i do not know how to type it, look like chinese chars or japan, korean, etc).
I wish to know if there is any App that can let me specify how many 3GiB files i want on the “internal” FAT32 partittion, then loop mounts them (as for the Linux over Android i had used), format that loop devide as Ext4 (Ext2 or Ext3 if no way Ext4) and let me put there the Apps.
Till then i found an ugly trick… some apps i moved them to System (like AntiVirus, BackUp apps, … admin tools, etc), till i only have near 25MiB free on it, the rest apps that still takes a lot (some games took more than 50MiB each) i put them on a not runable mode in the FAT32 by using a BackUP method that also saves “progress” (all app data and apk, etc)… so i let at least 200MiB free on /data… then when i want to use any of it i do this steps: restore, play, backup, uninstall.
Why on the hell with a 16GiB they only let 512MiB for /data partition? At least 2GiB or 4GiB and it will be enough. Also why each of such “candy” games put more than 40MiB (part of total app size) on internal memory that can not be moved to FAT32 by Link2SD? I have a game that is 1.5GiB installed, it by itself put such data on the FAT32 and its main app can be moved by Link2SD at 100%, the game detects if such FAT32 is on a removeable storage (if so it refuses to use it to avoid game data manipulation cheaters), so i have it mainly to demostrate my internal 13GiB FAT32 is on a non removable chip, i do not like the game… it asks to buy (with real cash) all except one ‘free’ very short level.
I’m using Samsung galaxy on7 (1.5 gb ram and 8 gb internal) and using 16 gb memory card. Android version 6.0.1. Can I do this process ?
how to root intex 4
.4.2
You can pick any rooting tool of choice from here
how to root 4.4.2 intex
everything is going as planned, however, at the end I get a message that some “external data and obb folders have not been bound during boot time. Would I like to rebind these folders?”
and I am getting a mount script error as well, ……………../data/sdext2: No such file or directory…..I think I’m going to start over….
I got a cheep Azpen tablet with 4GB.
On “Internal storage” there is a partition of 787MB where the Apps are downloaded to and another “Internal storage” (sdcard) of 1.08GB where Pics, Videos, Music, ect. are downloaded and stored.
I got a 16GB micro sdcard (extsd) and swapped the sdcard and the extsd . (internal new reads 14.46GB / external new reads 1.08GB)
I want to be able to use the full 1.08GB as part of the 787MB internal storage.
I followed your instruction but i don’t think I did it right (use the full 1.08GB)
See pics below
Please can anyone help here or to my email
[email protected] (put “tablet help” on the subject line)
looks like you did everything right from the screen provided, are you still experiencing any form of low internal memory warnings after this?
Hi, my tablet has 4Gb on internal memory and another partition of “SDCARD” storage of 64Gb (59.78 of which is free). There is no SD card inserted into the tablet, it is simply a partition of the internal drive. I have tried using the ROEHSOFT application above, but have only managed to expand my virtual memory from 3Gb to 8Gb, how that happened I’m not sure. Currently the SDCARD shows as 57.69/59.78 GB Free and RAM Free of 1.28Gb/3.75Gb.
I want to increase the internal memory from 4Gb to at least 16Gb, but I would prefer 32Gb. Is this possible using the ROEHSOFT RAM Expander app?
I’ve tried following the instructions for expanding the storage without using a PC (as there is no physical memory card), but its not really working. Can you let me know if this is possible and if so how to go about getting it done?
(Using Android 5.12 on a Generic cheap chinese Tablet), I have successfully rooted the tablet and have enabled OEM Unlocking as well as USB debugging mode. Please let me know if you need any more technical details.
Hi guys i have followed this guide exactly and i cannot get it to work. I have a 32gb sd card and the device that im trying to use it on is an lg g pad v500 8.3 16gb tablet. I successfully got it to work once by which i was able to use 4gb on the sd card witch the tablet recognised but i want to be able to use nearly 28gb of this sd card as internal but it seems that anything above 4gb the tablet doesn’t recognise the sd card. I have two partitions made one fat32 with approx 28gb and one ext2 with approx 1gb. Can you advise me on whats going wrong? Thanks so much…
By the question pSch,
do you intend using 28GB of your storage space with the link2sd app? What’s the maximum sdcard size support for your tablet?
I would like to use the 28GB of my storage space yes. I got an error message when i used link2sd app,mount script….invalid argument or something like that. My tablet will support sd cards up to 64GB…thanks.
Yes i do intend to use all 28GB but the link2sd app gives me the mount script error invalid argument or something so i cant use the app,and my device will support up to 64GB sd card thanks…
Worked like a charm. Thanks. However I’m a little confused about what android reports as storage under settings after this linking is done as instructed. Shouldn’t android now report a total storage of internal storage + the newly partitioned sd card space?
Not at all Jagannathan,
The ext partition would be recognized for internal memory usage only.
Thanks for dropping by
Sorry, still not clear to me. I have a 16GB tablet that has 13+ GB of total internal space and 5.7GB of free space before I did this activity. After I inserted a 16GB SD card and created a 13GB partition with ext2 and linked all apps to SD card, now Android Settings-Storage shows a similar 13+ GB of total internal space but the free space has now increased to 7.7GB…not sure I understood what is now different. I assumed the total internal space would now show up as 13+GB (original) + 13 GB (SD card new partition)
Can you please clarify? Thanks
In my own opinion, 13GB is so large a size to use for the internal storage (ext2 partition), 4GB or less sounds more practical as apps and games usually take lesser space than music and videos that will usually need the larger bit.
Your free storage space might have increased as a result of 5.7GB plus what is left free from the 16GB-13GB section of your sd card.
As stated in this tutorial, your sd card should be partitioned with (a) primary and (b) ext2 drive with each made active and settings applied thereafter.
Once you have done everything correctly sir, the ext2 section will be used as an internal storage memory while the primary partition will keep working as a regular storage media.
Thanks again for the time.
I am seeing one more issue now. As stated, I had linked all my apps to the SD card setup with a 13GB primary partition. And in Link2SD app, I had set the option to Auto Link new apps and also set the default install location to External in Link2SD app. Now, when I try to install a new app from Play Store, it gives me an error “Insufficient storage”. Can you pl advise what went wrong?
Did you move previous installation to the SD card? seems like your internal memory (apps) was already filled up to the brim. You can also plug back your sd card to the PC and run diskmgmt.msc to confirm that the partitioning was done correctly.
You can also use the app referenced in the updated section of this tutorial.
You have to leave the default installation to ‘Auto’, and not set it to the SD card.
I did everything but the phone still showing the old small internal memory. help!
did you successfully move them to the external sd card as well as set the option to automatically move new apps to the external sd?
after partitioning the sdcard and running diskmgmt.msc do you normally see the two partitions?
You can try out the updated section of this post for the easiest method to increase android internal memory without a PC
hi, everything works fine, but i think i forgot to set the fat32 partition to primary, so, when i connect my cell to the computer nothing shows up, not even partition wizard displays the sd. How can i fix this?
remove the SD card and connect to the computer again via a Card reader ==> use windows logo+r => type devmgmt.msc and see what it reports about your memory card
Is this way can work on Nokia XL ? And I have problem in understanding Part B no. 6,7,8 and 9. Thank you
Hi Amr,
Your goal is to create a secret partition that isn’t going to be visible on your Android device but will be used by the app to mimic the internal storage so as to create more space for games and apps.
So, the first step is to delete the entire drive volume and partitions so that the whole drive size shows up as unallocated.
Then create a new primary drive from the “create” option making sure that the “logical” from the drive type at the right panel is changed to “primary” and file system changed to either fat or fat32 depending on the drive size.
In this step above, the full drive size mustn’t be used, enter a new size in MB (megabytes) leaving out a gig or so to remain unallocated.
Then locate the unallocated space again and use the whole of it for the next partition which must be changed from “logical” to “primary” and file system changed to Ext2 from the left panel.
Apply changes and reconfirm that the two drives now created are showing as “primary” and file system showing as fat/fat32 and Ext2 respectively.
Insert back to device and enjoy.
Its this easy and completely risk free.
Please try this time around and give feedback, else, I’ll make a screen shot guide covering each of the steps.
Much Regards
Yes yes I understood but the point that I still don’t understand is that which one of the 2 partitions I will use for apps and games ? I have a 2GB card and I want to specify 1.5GB for apps and games, through your steps which time of the 2 times I will specify this 1.5GB ? Hope you can understand my point and Thank You
The first one should use the 1.5GB for apps and game while the second should use the remaining space for the EXT2 partition
Thanks alot. I’m going to try it and tell you what will happen ;)
I await your feedback Amr.
Thanks
Not working in nokia xl…
I tried so much but this is not working…in my phone sd card not working i need to format it and after that it willbgain its original shape…
Any idea??
It went wrong for me and my ZTE Nubia Z5S at the end of Part B. I wasn’t wable to copy the backup back to the phone becase it didn’t show up anymore in “My computer”. In “Settings > Storage”, my phone didn’t show any information about the SD. Only the “Format SD” option was there.
The Z5S is a little different… It has 2 GB internal storage (system apps are placed here – also serves as the standard install location for new apps) and 16 GB SD storage, but you aren’t able to take out any of them. Both of them are inside the phone, but they work just the same way as on a normal phone where you are able to replace the SD.
As my phone wasn’t able to detect the “external” storage, I pressed the “Format SD” option in the storage settings, and after the process was done the “external” storage showed up, empty of course. I reconnected the phone to my computer in order to restore the backup I had made, but nothinng appeared in “My computer”. I opened the partition tool, and there it showed up. I noticed the phone had formated the storage and turned the whole thing into a standard FAT32 partition. I also noticed the partition didn’t have any drive letter. I asigned a letter, and it showed up again in “My computer”. I got the backup restored to the phone, and it now works fine again.
Do you have any idea what may have went wrong? The phone is rooted with custom MoKee ROM and CWM recovery.
Hi buddy,
There’s one thing I’ve noticed, persons that called me to have a chat with me about this usually succeed with it.
Most complaints are coming from persons that misses a step or didn’t follow the guidelines slowly.
Both the first and second partition must be set as “primary” and the second one must use the ext2 file format.
Avoid using any of the partition as a logical drive.
To make this clearer, I’ll have a chat with you either on WhatsApp or Skype, the only favour I’ll demand from you is to share the steps in your own words to help others not have issue with the guide.
Much appreciated,
Your guide has saved me the annoying low memory bug on my gionee pioneer phone but I used a 2gb memory card, what happens if I purchase another bigger memory card?
You can still repeat the process all over again, but backup all contents on the previous drive and restore to the newer after the exercise
because of these instructions, my phone is rendered to useless… all applications including google play store is gone. thank you a lot for your misleading information. PEOPLE, DO -NOT- FOLLOW THESE INSTRUCTIONS IT WILL MAKE YOUR PHONE UNUSEABLE !!!
Hello Tanya,
Thanks for voicing your comment on this post.
I understand your sadness but if you are going to use the caps-lock on us, you should at least tell us the model of your Android phone and more details about the problem you are facing. So that we can help you out.
If you haven’t fixed this already, please reply to this comment.
Hi Tanya,
I am particularly sorry for your pains, it is clear you had some difficulty understanding this guide or following it accordingly.
I have got countless compliments from users thanking me for this, let me know in details what went wrong and what you did actually.
I might be able to get your phone back to a good state without loosing a single data or previous configurations.
I will as well take you by the hands through out this guide like I’m talking to a novice.
get back to us as soon as possible
LOL.. dude this doesn’t work.. atleast not on samsung galaxy trend plus with android 4.2.2 .. the only thing what happens is half the memory capacity of my external memory card is lost,as i formatted and splitted it as told in this guide. and the phone memory remains the same.
Thanks for dropping by Darra, just a few questions for you, did confirm the secondary partition was properly created by entering diskmgmt.msc in the command window?
Secondly, following this guide isn’t going to physically increase your internal memory but allows you to use a portion of your SD card as internal storage.
This allows you to free up your internal memory by moving and installing apps directly to it.
Also point me to the message you normally get when trying to move with the link2sd app.
“/data/sdext2 mount not found ” says when it is multi selected and clicked on create link ……..
Have you resolved this already?
hey… i already do partion ext2 and i install link2SD but it dosent work!! help please… it’s showing ( mount script cannot be created. not allowed to su) do i have to install any other program?
Is your device rooted?
it is showing sd card not mounted plz help me
insert your memory card back to the computer and press windows logo+r ==> then type diskmgmt.msc into the window and hit enter ==> confirm the secondary partition really exist on the card
hi, i have same prblm with sawaz i have verified the SD on computer and i got it partitioned.what should i do now?
please follow the steps outlined in my response to him and get back to me at once.
Regards