If you are looking for a simple tool that can record your Windows or Mac screen, you are in the right place. Movavi Screen Recorder ranks high among some of the top user-friendly screen capture tools in the market.
Unlike many third-party screen recording software, using Movavi doesn’t call for any prior experience. We highly recommend this desktop recorder for its intuitive nature, making the recording bit easy and the editing process.
You no longer need to panic about storing all the information from webinars and tutorials in your head. Using this app on your computers will make your life easier. You can simply record the screen (with audio) to rewatch it for later reference.
To give you a better picture, we’ve designed a detailed review of the Movavi screen recorder software. It includes features, pros, and cons, using instructions and all you need to know.
Key Features of screen video recorder by Movavi
- Creating Screencast
- Scheduled Recording
- Several exporting options
- Screenshot editing
- Draw on video while recording
- Customizable shortcuts
- Instant file sharing on social media
- SuperSpeed conversion
- Keystroke & mouse click capture
- Video and Audio recording
Product Features
Screenshotting Mode
Movavi allows you to take screenshots during video recording. Moreover, you can edit these shots before saving them using the screenshotting mode. It lets you highlight portions; add arrows, shapes, and lines; and enter text.
Screen Recording
This feature involves the following aspects:
Frame Rate:
A higher frame rate adds to better video quality. You can record your screen with a frame rate ranging between 5 t 60fps (frame per second). Make sure you adjust the frame rate to match your system’s capability, as higher frame rate videos take up more space.
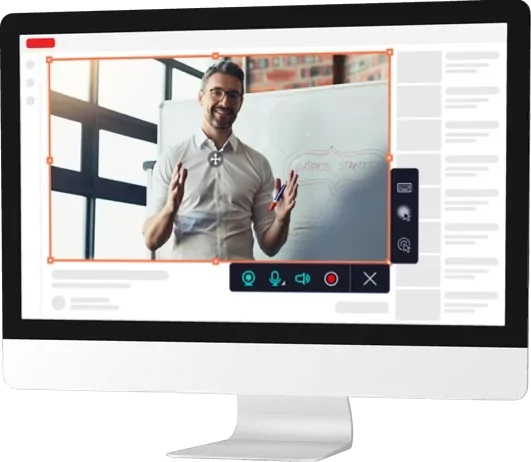
Area selection:
In the Movavi app, selecting the capture area before recording is effortless. Record the entire screen if you like. However, you can also manually set the required portion of your desktop screen or program window.
Webcam Overlay:
You can also include webcam recording in your video. For webcam, too, you get to set the frame rate, size, resolution, and position.
Audio recording:
You can choose audio quality for your screen recording. It can be stereo or mono. Plus, you can also change the frequency. It allows you to record separate sound streams as well (from the microphone and system speaker).
Acceleration:
As you know, Movavi is a life-saver since you can schedule your recordings on it. But did you know that it enables acceleration on this app? Your video gets processed faster and smoother with hardware acceleration. However, its type (AMD, HD Graphics, or NVIDIA NVENC) depends on your video card. The SuperSpeed conversion function also works on all acceleration types.
Effects:
Many would want to add effects to enhance the effectiveness of their video. In Movavi, you can highlight the cursor and choose separate colors to capture cursor movements. You can also show keystrokes.
Social media shares and Export
Post recording, you need to save and export the output. Screenshots can be saved in JPG, PNG, or BMP formats. You can save videos in formats like MKV, MP4, MOV, or AVI. Additionally, users can extract the audio and save it separately as an MP3 file and turn the video file into a GIF.
Once the saving part is done with, you can move on to social sharing. The app allows you to share pictures via Telegram and WhatsApp or share video content to Google Drive or YouTube.
Movavi License & Limitation
Movavi Screen Recorder has a free version, but it comes with limitations like watermarking video outputs. However, professional users can always get the licensed versions for the complete feature package. You can either go for a 1-year Business subscription or a Personal Lifetime license.
There aren’t any functional variations between the two licenses. The business license allows you to use the tool in a commercial environment, whereas non-commercial users can buy a personal license. If you purchase more than 5 business licenses at once, the company offers discount rates.
With a personal lifetime license, you can capture webcam video, sound, record online videos, and edit screenshots.
Tech Specifics:
- The installation size for Mac and Windows is 89.6 MB and 42.8 MB, respectively.
- It has AMD, 64—bit intel processor, 1 GHz compatibility.
- Movavi works fine on 2 GB systems.
- The app takes up 280 MB of hard disk space on installation.
- You will require system permission for installation.
Pros:
- Comparatively cheaper screen recording software for both OS
- The control panel is not a distraction while the recording is on.
- It allows quick screen capture editing.
- You can schedule your screen recordings and plan an auto-shutdown for your system when the recording is over.
- It offers plenty of export options.
- The editing tools allow users to trim the video for easy removal of unwanted segments.
- To make editing more manageable, you can record microphone and system sound in separate audio streams.
Cons:
- The trial version comes with a catch. While most features are free, you’d need to buy a licensed version to access all the features.
- The program does not allow users to directly go to the folder where the previous recordings are stored.
- Currently, there is no Linux version.
How to use Movavi Screen Recorder
Step 1: Install
The program is available for download on the official Movavi website. Run the installation file on your Mac or Windows computer. Make sure you follow the instructions of the process.
Step 2: Adjust screen recording parameters.
- You can either record the entire screen or a small portion. For the latter, long click the left mouse button and drag.
- To make the recording more impactful, you can add keyboard actions and cursor movements to your video. The sidebar has the appropriate icons for this.
- Using this program also means that you can capture output and input sounds, individually or simultaneously. To know that it is activated, ensure that the audio source shows in green highlight on the bar below.
Step 3: Record
You can start capturing your screen by pressing the REC button on the app. To finish the recording, click Stop. Alternatively, you can also use hotkeys for the same- in Mac, press ⌥
⌘ 1 and ⌥
⌘ 2 for pausing and stopping the recording, respectively. Windows users, on the other hand, can hit F9 and F10.
If you hit the correct icon on the control panel, you can take screenshots during the video recording. You can also do this with hotkeys: ⌥
⌘ 3 for Mac and F8 for Windows PC.
Step 4: Trimming
Once you finish the recording, a preview window will pop up. Here, you can either straight-away save the output in your preferred video format or use the built-in editing tool to eliminate the unwanted portions.
You need to click the Cut option to trim the recording and repeat if required. The Delete button allows you to remove the unwanted fragments permanently.
Step 5: Save and Share
To save the output, click Export, select the format and folder, enter a file name, and hit Save. Movavi also allows you to share the video or images directly to YouTube, Google Drive, or Movavi Cloud.
Overall, we found the Movavi Screen recorder to be an excellent recording tool for home and office use. The clutter-free interface makes it perfect for all users. It allows you to get all the basics done, as mentioned above. However, when it comes to advanced video editing, it might fall a little short.


