The art of video editing has evolved exponentially with the digital age. From YouTubers to indie filmmakers, the Mac has been a preferred platform for many, offering robust solutions to weave visuals and audio into compelling stories. Whether you’re a novice or an experienced editor, the Mac environment can be your playground. This guide dives deep into the nuances of a free online video editor on a Mac.
Choosing the Right Video Editing Software for Mac
- iMovie: A perfect starting point for beginners, iMovie offers a user-friendly interface. It simplifies the art of stitching together clips, adding music, and incorporating basic transitions. With iMovie, Apple presents an intuitive platform for those taking their first steps into the world of video editing.
- Final Cut Pro X: The bigger sibling of iMovie, Final Cut Pro X, is a professional-grade software tailored for more advanced projects. From multicam editing to advanced color grading, this software is ideal for those looking to up their editing game.
- Adobe Premiere Pro: A giant in the video editing world, Adobe Premiere Pro is available for both Mac and Windows users. Its integration with other Adobe software, such as After Effects and Photoshop, makes it a favorite for many seasoned editors.
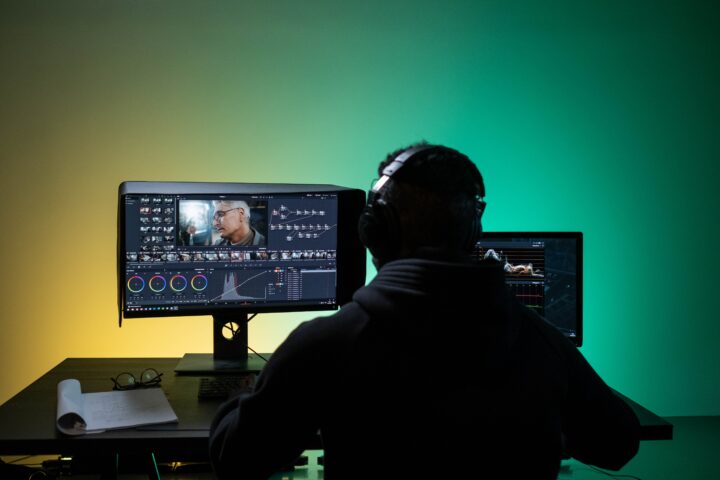
- Other Noteworthy Mentions: Tools like DaVinci Resolve offer exceptional color grading capabilities, while Camtasia is great for screencasts, and Lightworks gives a different editing perspective.
Basic Video Editing Techniques
- Importing Footage: Your editing journey begins with transferring your video files to your Mac. Use a card reader or direct cable transfer. Once imported, ensure you organize clips into dedicated folders or bins for easier access.
- Trimming and Cutting Clips: Every story has fluff; the magic lies in trimming it. Use the razor tool to make cuts, and the trim handles to shorten or elongate clips, ensuring a seamless narrative flow.
- Transitions and Effects: These are the spices in your video recipe. From a classic dissolve to a modern glitch effect, transitions can dictate the mood of your storyline. But remember, while they’re appealing, overuse can make your video feel disjointed.
- Working with Audio: The unsung hero of any video. Adjust levels to ensure clarity, add background tunes to set the tone, and integrate audio effects where necessary to enhance the viewer’s experience.
Advanced Video Editing Techniques

- Color Grading and Correction: This is where you paint your visual masterpiece. Dive into the color workspace to adjust hues, contrast, and brightness. Whether you’re aiming for a moody noir or a vibrant summer feel, color grading can make your video pop.
- Keyframing and Animation: Want your text to slide in from the left? Or maybe you want your character to fly across the screen? Keyframes allow for such animations, providing control over the movement of elements in your footage.
- Multicam Editing: Especially useful for events or interviews shot with multiple cameras. By syncing these clips based on audio or timecodes, editors can switch between different angles, providing a dynamic viewing experience.
- Advanced Audio Techniques: Dive deeper with tools like compression to maintain consistent audio levels, EQ adjustments to refine the sound quality, and noise reduction to eliminate unwanted background noise.
Enhancing Your Edit with Graphics and Text
Adding Titles and Lower Thirds:
The world of text in videos is vast. Titles, often the first thing your audience sees, can set the mood and tone for the entire video. They should be designed to capture attention and resonate with the theme of your content.
Meanwhile, lower thirds, which typically appear at the bottom of the screen, provide viewers with context. They’re especially useful for introducing speakers, and locations, or giving additional information.
When designing these elements, it’s crucial to pick fonts and styles that are both visually appealing and easy to read. Also, be mindful of their duration on screen, ensuring viewers have adequate time to read without feeling rushed.
Integrating Graphics and Visual Effects:
Graphics can elevate the visual appeal of your video. They can be as simple as animated logos or as complex as 3D renderings integrated into your scene. When integrating graphics, consistency is key; ensure they match the overall aesthetic of your video.
Visual effects, on the other hand, can add flair and drama. Slow motion, speed ramps, and even CGI elements can make scenes more dynamic. If you’re aiming for a touch of Hollywood magic, consider exploring green screen techniques. Chroma keying allows you to transport your subjects to virtual sets or exotic locations, expanding your storytelling possibilities.
Motion Graphics and Overlays:
These animated elements can be layered over your video to highlight specific points, add depth, or simply enhance visual interest.
From animated infographics explaining complex topics to subtle animated overlays that complement the scene, motion graphics are a powerful tool for editors. Ensure they are smoothly animated and don’t overpower the main content.
Using Templates:
Not a graphic designer? No worries! Many editing software solutions offer built-in templates for titles, lower thirds, and even motion graphics. These templates can be customized to fit your brand or video’s style. They’re a great starting point and can save valuable editing time.
Exporting and Sharing Your Video
- Choosing the Right Format and Codec: Where is your video headed? For online platforms like YouTube, MP4 is a popular choice. However, the format and codec you choose should depend on your video’s destination. Prioritize a balance between quality and file size.
- Direct Sharing Options: Many video editing software options offer direct publishing to platforms like YouTube, Facebook, or Vimeo. This simplifies the process, but ensures you’re familiar with each platform’s preferred settings to maintain video quality.
- Archiving and Backup: Once your masterpiece is complete, save your project and raw files. Consider using external hard drives or cloud storage. It ensures that should you need to revisit or modify your project in the future, you’re well-prepared.
Conclusion
The art of video editing goes beyond just merging clips. It’s about crafting a narrative, setting a mood, and engaging an audience. On a Mac, with its plethora of software options and intuitive interface, this task becomes even more of an exhilarating creative journey.
Whether you’re a beginner using iMovie or a seasoned professional on Final Cut Pro X, the platform offers all you need to bring your visions to life. So, dive deep, experiment, and remember: every video you edit is a new story waiting to be told. Embrace the craft, and let your Mac be your canvas.


I appreciated the practical tips and tricks you shared, like using keyboard shortcuts and the importance of storytelling in video editing. Your explanations of the various software options available for Mac users and their features were informative. Thanks to your article, I feel much more confident in my video editing abilities.