So our guide on top best rooting software and root without PC apps has gained lots of comments with some persons complaining of their inability to root Samsung galaxy and other high-end Qualcomm devices. We thought it necessary to create this guide because of the poor success rate reported by users of newer models of Samsung Galaxy phones and tablet devices.
Samsung galaxy note, smartphone, and tablet devices are normally powered by the award-winning Qualcomm processors that powers that of iOS too (see how to Jailbreak iOS devices here).
So I’ll be sharing these top methods to use for granting root access to Samsung Galaxy smartphones, phablets, and tablet devices. Some of these rooting methods can be used for HTC, high-end Huawei, and Motorola smartphones.
Ping pong root
Ping pong root apk is an app created solely for rooting Samsung galaxy s6 and Samsung galaxy s6 Edge smartphones. Its creation, development, updates, and distribution is 100% credited to the ever-awesome team at xda-developers Forum.
Ping pong root is apt and flawless for getting root access on Samsung Galaxy S6/S6 Edge smartphones (powered by Android 5.0 lollipop and Qaulcomm C.P.U).
How to Root Android with Ping Pong Root Apk
The steps to root a Samsung Galaxy S6 device with Ping pong root app is similar to the ones listed above. All you need to do is follow the following pattern:
- Enable the installation of apps from unknown sources.
- Download and install the SuperSU app from Google play store or from a 3ptechies upload here.
- Download Ping pong root apk from here and copy it to your phone’s internal memory.
- Install and run Ping pong root. Allow it to install superSU/binaries.
- Run superSU once to activate it, ignore the error message prompt (after app closure), and return to the Ping pong root app’s main screen.
- Launch it and click on download data (assuming that your device is already connected to the internet).
- Click on get root to complete the Ping pong rooting method processes. Accept every permission message prompt and reboot the device once the operation is completed successfully.
Odin Rooting Tool
Odin is an award-winning tool for installing official ROMs, customs ROMs, modified firmware MODs and etc. to Samsung devices.
It can be used to install a root-injected ROM to every Samsung device, thereby granting root access to it in a few minutes. The procedure for rooting with Odin is complex and should only be attempted by advanced users.
To root with Odin, you’ll need to hit the search engines with your “Samsung device model + Odin rooting method”. Eg; Odin rooting method for Samsung galaxy note 10.1.
WeakSauce
WeakSauce is a popular rooting tool for HTC smartphones and devices. It is one of the best options for rooting HTC One M8 and similar HTC devices.
We have used it a few times and can confidently recommend this rooting tool to owners of HTC one M8 and similar devices with Qualcomm processors powering it. You can easily download WeakSauce from this URL.
CF-Auto-Root Method
CF-Auto-Root is a perfect alternative to ping pong root apk. It has support for a range of Samsung Galaxy, HTC, Sony, and Google Nexus devices.
In fact, it is an app built for rooting high-end Qualcomm-powered Android devices. You can download and root with CF-Auto-Root app by following after the tips and download links found at cfautoroot.com.
Note: For most Samsung galaxy devices, a combination of Odin plus CF-Auto-Root is the best rooting method. This is because it installs the award-winning super-SU root administration app in place of superuser, rootmaster, and other root privilege management apps that have too many limitations.
This method is also preferred for newer Samsung Galaxy phones and devices because of the developer’s reputation, age, and capabilities of these awesome rooting suites.
Detailed Guide On How to Root Samsung Galaxy Devices with Odin & CF-Auto-Root
This is a detailed template for rooting a Samsung galaxy device on Windows
Computer with Odin and CFAutoRoot file. For this tutorial, the Samsung galaxy note 10.1 (3G, Wi-Fi) tablet device is used.
You can apply it to any other Samsung Galaxy phone or device. The only thing that’d be different is the root file and nothing else. You can get the proper root file for your phone by searching with “deviceName + model + root file” on Google or any other search engine.
Here are the steps to root a Samsung galaxy note 10.1 devices on a PC using Odin and CF-Auto-Root files.
- Charge your Phone to 45% or above.
- Download and Install Samsung USB Driver on your computer machine. If Samsung
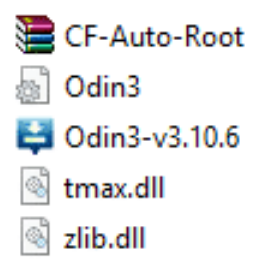
USB Driver is already installed on your computer, then do Skip this Step. - Download and extract the root files to your computer machine (a sample root file for Samsung galaxy note 10.1 can be found here). After extracting the archive, you
will be able to see the Odin executable, and CF-Auto-Root package as seen in the image below.
- Switch off your Samsung galaxy note 10.1 Tab (or any other Samsung device) and boot into Download Mode by ==> Press and hold the Volume Down button plus Power button at the same time for like 7 seconds or until you see that download mode is active on your screen.
- While in the download mode, wait for the Warning Yellow Triangle Sign to appear. Then press the Volume up button to continue to the next step.
- From the files you extracted in step 3 above, Locate and click on Odin3-v3.10.6 to launch the Odin utility app.
- Connect your Tab (or device) to the computer and wait for Odin to detect and add it automatically. Once added successfully, you’ll see it from the log at the left side of the screen or as seen in the image below.

- Once you’ve confirmed that your device is properly detected by Odin, ==>Locate and click on the PDA button and then select the CF-Auto-Root.tar file (the one you’ve extracted in step 3 above).
- Click on the Start button in Odin (as seen in the image above) to begin the Flashing/rooting process. Wait for some minutes for it to complete. Do not touch or disconnect even after re-booting. Once completed, you’ll see a large green box in Odin with Pass boldly written on it.
- You can safely disconnect your device after the pass message has shown up, and then confirmed it’s rooted by installing the root checker app from Google play store.
Prefers a Paid Rooting App or Professional Android Rooting Services?
Well, except you’re a one-off user of Android, I don’t see using paid apps for rooting as a viable option. This is because rooting is fun and usually repeated on new devices.
Besides, Android is an open-source operating system that encourages independent contributors. There’s the possibility of getting root compatibility Free for your new device; as long as you’re willing to wait.
But if you are the type that prefers using a paid app for rooting and/or technical part of Android tweaking, I’ll recommend the paid rooting solution from one click.
This method is simpler as they would take you by the hand and root your desired Android phone risk-free. To subscribe to this service; simply download their rooting app free from this link & follow after the screen prompt.
They offer VIP Support for each device you root with their app.


is there any way to unroot the rooted device. i have oppo f3 plus and i rooted my phone by seeing steps on gadgets pit. but i want to unroot now beacuse tez is not working on rooted device. please tell me how to unroot it ?
Hello,
You can unroot Android devices with any of these top best Android unrooting methods.