You’re probably wondering why your website hasn’t changed to HTTPS despite already purchasing and installing an SSL certificate properly. I’m here to tell you that you might have forgotten a step – you need to force the website to load through HTTPS.
Worry no more. In this article, I will show you the step by step instructions on how to force the website to load safely via HTTPS.
What is an SSL certificate?
SSL is short for Secure Socket Layer, and it is a protocol necessary to establish a secure connection between a server and a client. The certificate encrypts website data so that during transfer, intruders cannot read or tamper with sensitive data exchanged between websites and browsers.
According to Hostinger, you can get an SSL certificate for free with a hosting plan, such as the WordPress hosting package. The package also includes an easy one-click install button to get the SSL up and running immediately.
Why do you need an SSL certificate?
An SSL certificate is crucial for websites that expect a lot of visitors and handles plenty of sensitive transactions. According to the General Data Protection Regulation, sites that fail to protect customer data may be fined up to €20 million.
That is why eCommerce platforms are SSL protected to safeguard transactions between merchant and customer. SSL will encrypt sensitive data such as credit card numbers during transfer so that malicious third-parties cannot take advantage of the information.
Additionally, SSL security is a search engine ranking factor. If you want to give your website the best possible chances of achieving high SERP positions, you must have an SSL-enabled site.
Lastly, it’s a sign of trust. Visitors are far more likely to browse a site and purchase from businesses that show that they care about their data security through action.
I have already installed an SSL certificate. Now what?
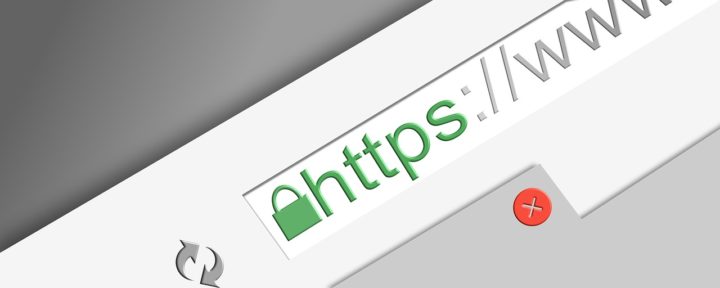
Now you’d need to force the traffic to go through the secure connection. When it is already in effect, you will see a green padlock at the leftmost of the URL tab, and your website link will begin with HTTPS.
I will list a step by step guide on how to do it on popular platforms (including WordPress and Other PHP CMS).
1. Use the .htaccess file
You can begin with configuring the settings in the .htaccess file that’s located in your site’s files. Almost every website that’s hosted on Apache or LiteSpeed server (Including WordPress, Joomla, Drupal, and other CMS [content management system]) uses .htaccess for commands and server-level instructions.
You’d need to access your site’s files through a file manager and find the .htaccess file that’s located under the Files category. From here, you’d need to edit the file, add the code below, and save it to force HTTPS redirection for it:
RewriteEngine on
RewriteCond %{HTTPS} off
RewriteCond %{HTTP_HOST} ^www\. [NC]
RewriteRule ^ https://%{HTTP_HOST}%{REQUEST_URI} [R=301,L]
RewriteCond %{HTTP_HOST} !^www\. [NC]
RewriteRule ^ https://www.%{HTTP_HOST}%{REQUEST_URI} [R=301,L]
This code will ensure that all of your links are rerouted permanently to HTTPS. This includes the links to your site from other people’s sites.
2. Define URL in the database
The goal in this step is to change your URL to HTTPS in the database so it does not load via HTTP anymore. The way to do this is to change the URL data in MySQL.
If you have multiple databases and you’re not sure which one is connected to the site you want to change, visit the control panel and open the File Manager. Select the domain name and click Go to File Manager.
After that, open the wp-config.php file and search for DB_NAME. The code next to it is the website’s database name.
Then, go to phpMyAdmin using the control panel options. From the left panel (where all of your databases are listed), select the one that is connected to the site, and click the SQL tab.
In the SQL tab, input the SQL query below and click on Go to update the URL to the HTTPS version:
UPDATE wp_options SET option_value = replace(option_value, 'oldurl.com', 'newurl.com') WHERE option_name = 'home' OR option_name = 'siteurl';UPDATE wp_posts SET guid = replace(guid, 'oldurl.com','newurl.com');UPDATE wp_posts SET post_content = replace(post_content, 'oldurl.com', 'newurl.com');

UPDATE wp_postmeta SET meta_value = replace(meta_value,'oldurl.com','newurl.com');Note: You must take note of the oldurl.com and newurl.com, and Replace the oldurl.com with the current website address and the newurl.com with the HTTPS address.
After pressing the Go button, the URL changes would immediately take effect, and the changed rows will appear with a checkmark on the side to show that the change is in effect.
Lastly, you’d need to verify the changes by using the wp_options table and check option_value. You should see the new URL below the column.
In case you get error messages, check if there are syntax errors and ensure that you are using the correct table prefix. If the problem persists, do contact your hosting support.
3. Change URL In WordPress Dashboard
This step is very simple, log in to your WordPress website and click on Settings, go to General Settings. There, you will see an editable column each for the WordPress Address (URL) and Site Address (URL).
Change the URL from HTTP to HTTPS in the two columns and make sure both have the same address. Click Save Changes to make sure you have stored the new settings.
4. Change the URL in wp-config.php
In this last step, you will be forcing the HTTPS address through wp-config.php, which contains all the important settings to your WordPress site. You can find wp-config.php in the root folder of your website.
You can edit the wp-config file by connecting to your website using an FTP client. Add this code just above the line that says ‘that’s all, stop editing! Happy publishing.’
define( 'WP_HOME', 'https://yoururl.com' );
define( 'WP_SITEURL', 'https://yoururl.com' );
Replace ‘yoururl‘ with the website’s domain name, and you’re set.
Finally, save the changes and upload the files back to your server. Congratulations, now your website loads securely through HTTPS.
Conclusion
An SSL certificate is crucial to secure data transfer between servers and browsers. It encrypts data during transfer using the public key, and only the server that has the private key can decrypt the message.
Without an SSL certificate, malicious third-parties may take advantage of unencrypted data during transfer, especially when it is sensitive data such as credit card numbers. It is a must for websites that handle transactions to equip their site with an SSL certificate.
To make sure that your website and all links load in HTTPS, you need to configure a few settings. First, check the .htaccess file and enter the appropriate code to reroute the website and all existing links to HTTPS.
Then, change the URL in the database so that the main URL does not load in HTTP. Open phpMyAdmin in the MYSQL database, enter the necessary SQL query to change the URL and save the new settings to run the changes.
Finally, change the URL in the WordPress dashboard and put the code needed for the wp-config file. Save the changes, and your website will load in HTTPS permanently.
I hope this article helps, if there are any questions, don’t hesitate to leave them in the comments section below.


