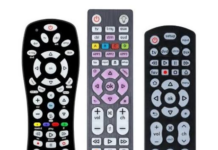

A GE universal remote sounds interesting if you have multiple electronic devices and appliances in your home and wish to have just one remote to control them. Lately, though, I’d prefer using my phone, which has IR remote support, rather than a physical remote. But yeah, a GE universal remote is still a good investment today, and here we’ll cover how you can program it with or without the codes.
3 Ways To Program A GE Universal Remote With Or Without Codes
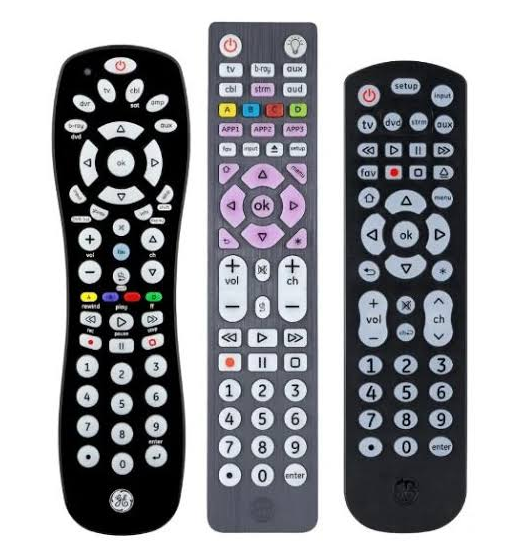
For some people, it may come as a surprise to learn that their appliance has a hardcoded number code that pairs it to a universal remote. Well, that’s how these universal remotes can be used to control almost every modern appliance you’ve got; they pair with your TV, light, Blu-ray player, and other electronics using specific digital codes.
But not everyone knows these codes; hence, there’s a workaround to pair your devices without using the code. The general procedure for this can be a bit tedious, which is why I said I prefer using my phone, which has IR remote support; it’s faster and easier for me. That said, let’s get down to business for the day.
Prerequisites:
Open the battery compartment of your GE remote to confirm its model; the model is pasted on a sticker inside the battery compartment. It usually shows a code list version like CL3, CL4, CL5, or CL6. Newer versions (CL4 and up) respond to the standard Auto Code Search, so you don’t necessarily need to know the codes for your devices. But if yours is an older CL3-era remote, you can only program it using codes.
Method One: Direct Code Entry (you already have the code)
This is, hands down, the fastest of the three methods, and it’s the one GE/Jasco recommends. The procedure is quite simple: you look up the specific 4-digit code assigned to your device’s brand, punch it into the remote, and you’re done in a matter of seconds, no guesswork involved.
But well, these things are not always as easy as they sound, right? Yeah. The catch here is finding the right code in the first place. Codes are tied to that CL3/CL4/CL5/CL6 code list version I mentioned above, and GE/Jasco’s own code sheets differ from one version to the next, which is exactly why I’m not going to paste a giant “universal” code table into this article; too many of the lists floating around online contradict each other on which code belongs to which brand and model, and a wrong code will only cost you more time.
Your safest bet is the printed code sheet that came with your remote, or Jasco’s own remote support site (byjasco.com), where you can look up codes by your remote’s model and code list version. Once you’ve got the code, here’s how to enter it:
- Turn on the device you want to control.
- Press and hold the SETUP button on the remote until the red indicator light stops blinking and stays solid, then let go.
- Press and release the device button (the device you want to control. For example, press the TV button if you’re trying to pair a TV; press DVD if you’re pairing a DVD player, and just like that for DVR, CBL, SAT, etc.) Once you press the button for the device you want to pair, the remote’s light will blink once and stay lit.
- Now, press in the 4-digit code for your device’s brand using the number pad on the remote.
- Pay attention to the remote’s indicator light: it should turn off if you entered a valid code, or flash a few times if the code wasn’t accepted. If it flashes, just try the next code listed for your brand; if it simply went off, then you’re in.
- Point the remote at your device and press the Power button. If the device turns off, then you obviously got it! If only some buttons don’t work, that usually means there’s a better-matching code further down the list for your brand. So, try another. ☺
Method Two: Program Without Code (auto code search)
As mentioned earlier, this method works when you have a newer GE universal remote model from CL4 upwards. For this one, you don’t need to enter any code; you simply point the remote to the device you want to pair it with, then leverage the auto code search feature to pair the two.
But for this method, you’ll need to keep an eye on the device you’re pairing the whole time to notice when it pairs; usually, the moment the auto code search hits the right code, your device should turn off or blink at least once (you ought to power on the device first before trying to pair it with the remote). If the device powers off mid-search, that’s your cue to lock the code in; miss it, and the remote just keeps cycling until you catch the next pass or start over.
Here’s the process:
- Manually turn on the device you’re programming (use its original remote or the buttons on the unit itself).
- Press and hold SETUP on the GE remote until the red light stays solid, then release.
- Press and quickly release the device button (TV, DVD/DVR, CBL/SAT). The light will blink off once.
- Point the remote at the device and press the Power (ON-OFF) button repeatedly, pausing about a second between presses. The remote can cycle through about 300 codes this way, so this step takes real patience.
- The instant the device you’re programming turns off, stop and press ENTER to save that code to the remote.
- Then turn the device back on and test the remote buttons. If the volume or other functions don’t respond correctly, press Power again to resume the search for a better match, then press Enter once it powers off again.
Method Three: Code-Based Programming (mostly on older models, CL3)
Honestly, this third method is the one that tends to confuse most people, including myself, because these older remotes do not come with the list of brand codes and lack the auto-search feature too. If you checked your remote’s battery compartment sticker earlier and it says CL3, or if you tried the “Method 2” above and it didn’t work, then ride on with me; let’s give this one a trial.
A quick honest note here: because this method comes from an older generation of remotes with several minor hardware revisions, the exact button combination can vary slightly depending on your specific model. So, treat the steps below as your starting point, and if they don’t quite match what your remote does, your printed manual (or a quick search for your exact model number) will have the precise variant.
Steps:
- Turn on the device you want to control.
- Press and hold SETUP until the red light turns solid, then release.
- Press the device button (TV, DVD, CBL, or AUX).
- Enter the numbers 9, 9, and 1 on the number pad.
- Press and hold the Channel Up (+) button together with the Power button, watching the device closely, until it powers off.
- Release both buttons and press ENTER to save the code.
- Turn the device on again and test the remote functions.
What More?
If none of the three methods above worked, double-check that you pressed the correct device button (TV, DVD/DVR, or CBL/SAT) before entering a code. Also try swapping in a fresh set of batteries; a weak signal can make the remote misread your button presses, and you may need to reprogram after changing batteries.
Finally, make sure there’s a clear line of sight between the remote and your device, and confirm your device/appliance is one of the brands/types that support GE universal remotes. You can always refer to this website to find GE remote brand codes.