
There are several reasons to want a proxy address, but the real question is, “Are you choosing the right proxy provider?” There are many good proxy providers, and today we’ll review one of them, IPcook, and provide a detailed guide on how to set up a proxy server on your Windows PC. Read carefully as I share my firsthand experiences with IPcook’s residential proxies.
IPcook Proxies Overview
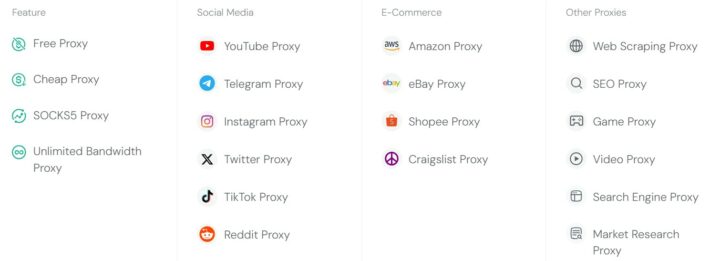
IPcook is a proxy service provider that offers four main types of proxies: Residential Proxies, ISP Proxies, Unlimited Proxies, and Datacenter Proxies. The SP focuses on high-quality proxies for a variety of purposes, from web scraping to bypassing firewalls, streaming on geo-restricted platforms, and multi-account management. While other proxy types work well, our focus today is residential proxies.
IPcook’s residential proxies come from real users’ home broadband and mobile devices in the specified countries and regions, while its ISP proxies are sourced directly from partnered internet service providers for high anonymity and reliable stability. One reason to choose IPcook proxies is their affordability: Their residential proxy pricing is among the cheapest for high-quality, ultra-flexible options.
The unlimited proxies come with no cap on the traffic allocation, but of course, that’s the costliest among all the proxy types offered by IPcook. On the other hand, IPcook’s datacenter proxies are the cheapest, but that’s for when you’re running a datacenter; For everyday personal or corporate business use, what you need is a residential or ISP proxy.
Introducing IPcook Residential Proxies
Residential proxies are best for making your internet traffic feel and act as though you’re residing in a foreign country. For example, you could be in India and get a United States residential proxy. When you set up that proxy on your PC and/or phone(s), your browsing IP will change from an Indian-based ISP IP address to a US-based one.
So, every piece of content you’d see online as you browse would be what is shown to people residing in the U.S. Also, if any website or streaming platform is exclusive to U.S. residents, you’d be able to access it using that proxy.
Features of IPcook Residential Proxies
Residential proxies work for many purposes, and IPcook offers competitive pricing. Also, the configuration is highly flexible. Here are some of the prominent features of IPcook residential proxies:
1. HTTP and SOCKS5 Support
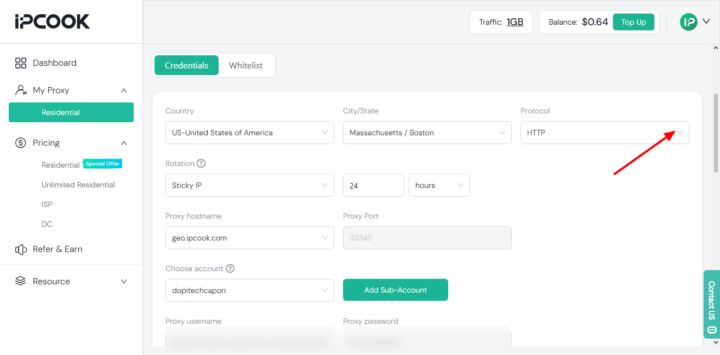
IPcook residential proxy setup page allows you to choose between HTTP and SOCKS5 protocols. Now, it all depends on how you want to use proxy IPs. Generally, the HTTP protocol is the top choice, but SOCKS5 offers a stricter approach to traffic routing.
2. 55 Million IPs
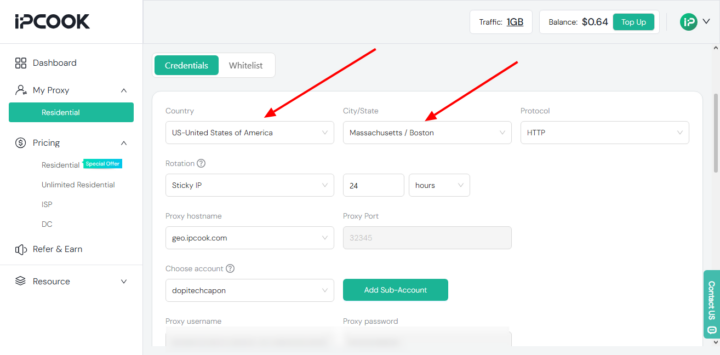
IPcook claims it offers over 50 million proxy IPs by targeting city-level proxies. For example, if you choose the United States as your preferred country to get proxy IPs, you can tune your preference down to the state and city levels. So, you can get an IP address for the United States >> Massachusetts >> Boston.
This means you’re getting the IP address of someone living in Boston, MA, USA, not just a general U.S. IP address. The specificity extends to all supported 180+ countries and regions. Plus, you can generate up to a thousand proxy IPs on one subaccount.
3. Up to 10 Sub Accounts
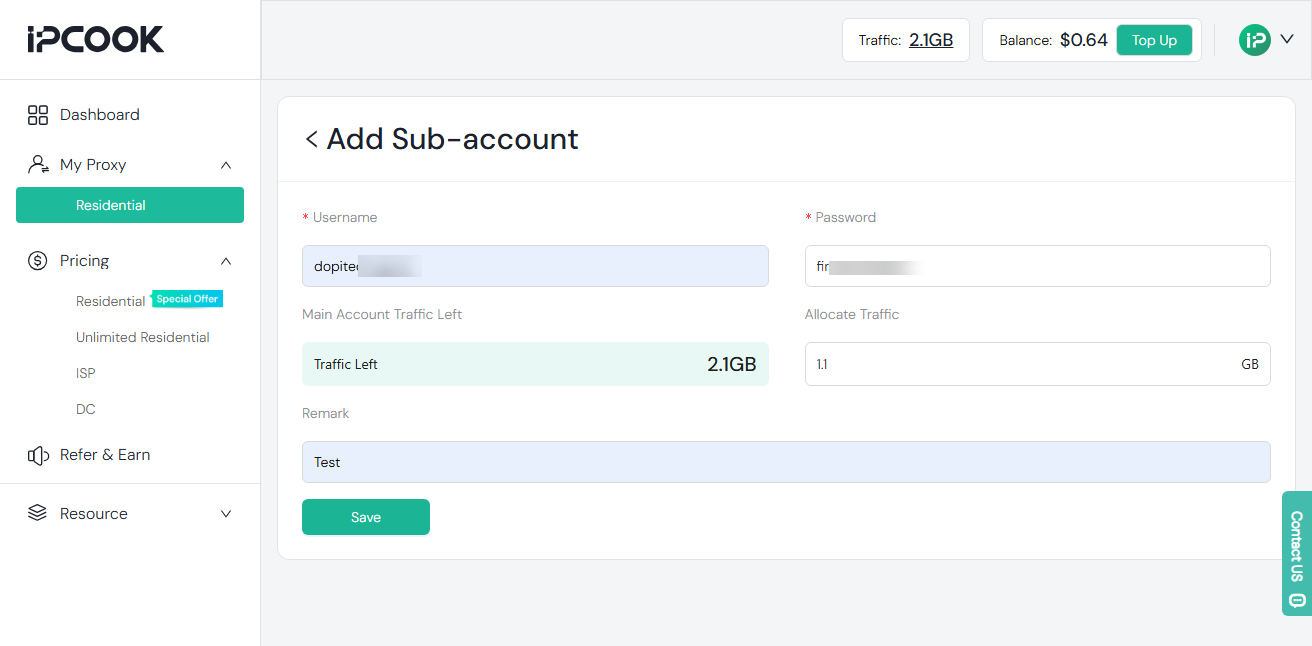
If it’s just you, one sub-account is all you need, but sub-accounts aren’t only for sharing. You can share unique proxies with teammates or family, or use separate sub-accounts to keep your projects isolated.
For example, if you’re running multiple tasks that all need residential proxies, give each task its own sub-account so they won’t interfere with each other. Task A won’t burn through Task B’s traffic and stop it halfway. IPcook lets you create up to 10 sub-accounts.
4. Generate up to 1000 Proxies Per Sub-Account
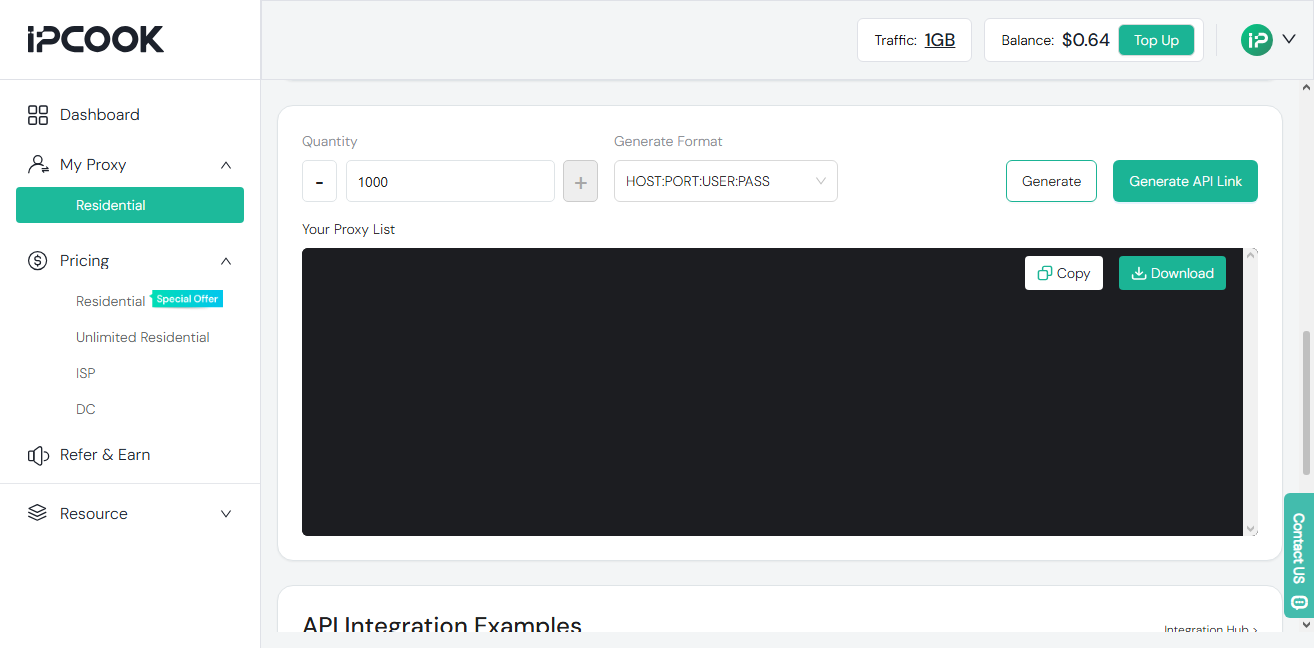
For each sub-account, you can generate up to 1000 proxy strings in one click to assign to your scrapers or fingerprint browsers, so when one goes offline, your program automatically switches to the next one. Yes, sometimes proxies go offline because they’re real users’ proxies; if those users (residing in the country/city you selected) shut down their device or travel out, that IP goes offline.
You won’t know anyway, but scenarios like this are a leading reason a particular proxy stops working. So, if that happens to you when using IPcook, you can fail over to the next proxy; and as I mentioned earlier, you can have up to 10 different proxies per sub-account. Also, you can delete any sub-account at any time.
5. Lengthy Sessions
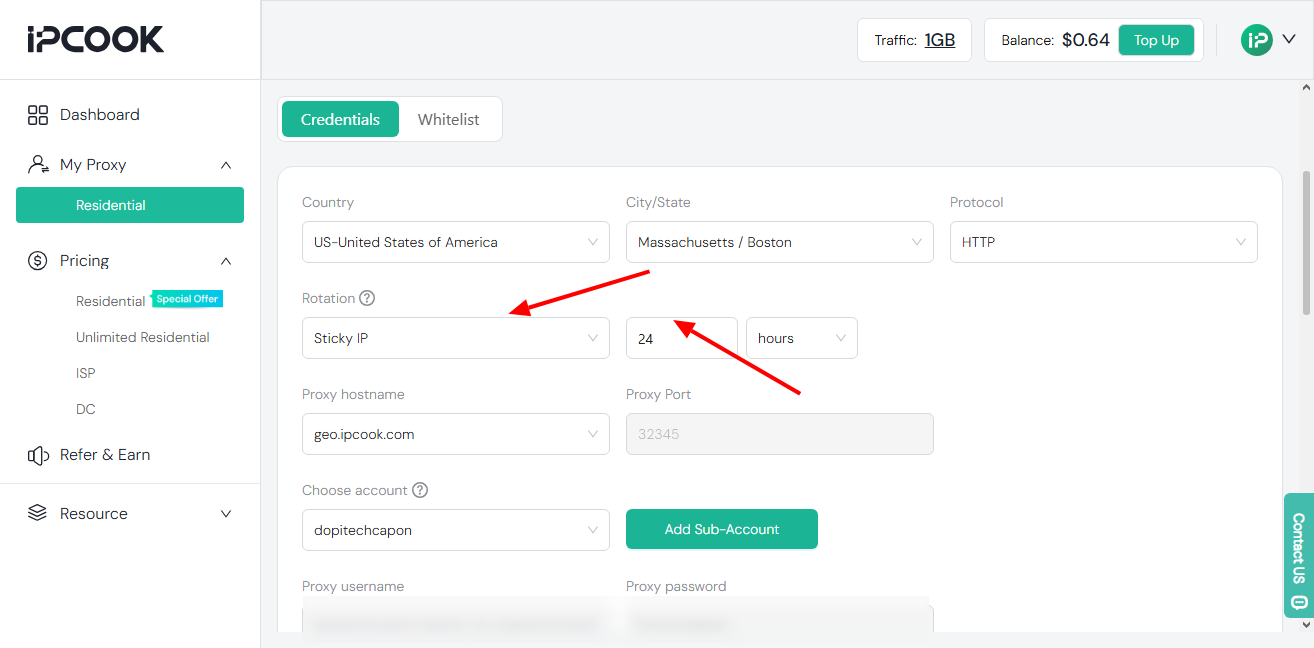
IPcook allows you to set sessions up to 24 hours for sticky IP configuration. This is genuinely important for a lot of web activities. Of course, randomized IP setup is supported if you’re setting up for web pinging or scraping.
6. Real-Time Usage Dashboard
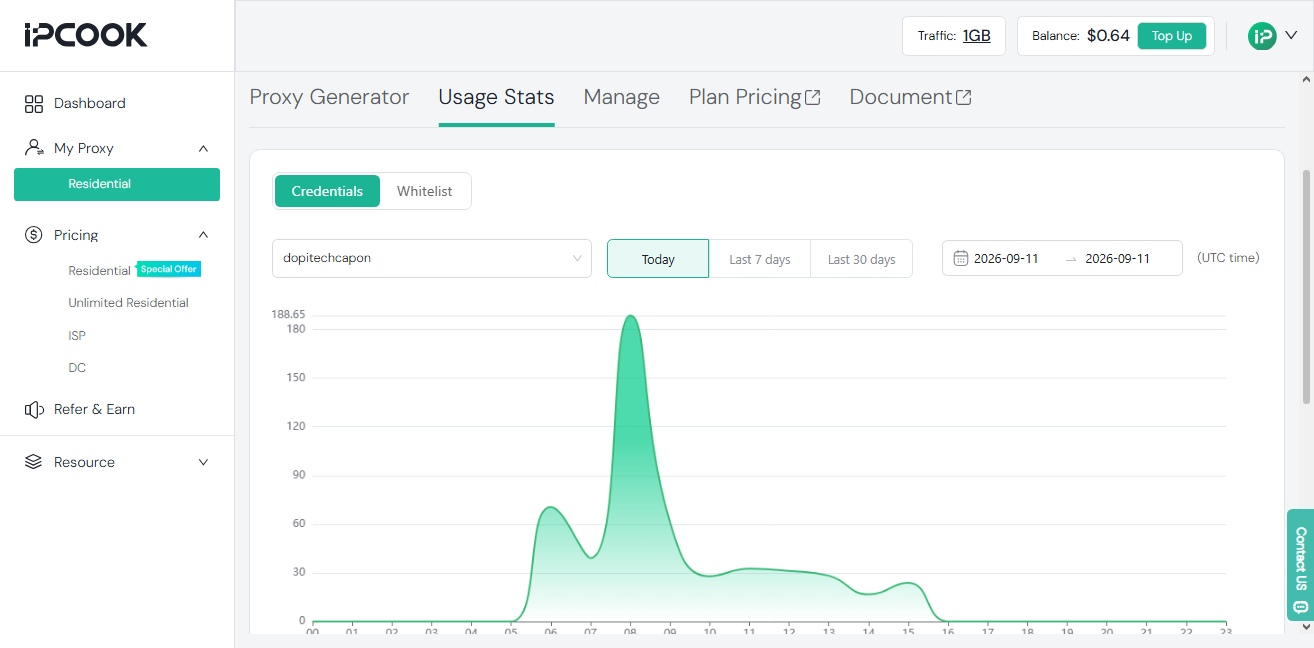
This is another good feature of IPcook; it offers a dashboard where you can track your traffic in real-time, so you know when your allotted traffic is about to be exhausted. You can also track traffic changes on the various sub-accounts you have, individually.
How to Set Up IPcook Residential Proxy
First, you need to register an account and verify it, then purchase the traffic quantity you want. IPcook residential proxies start at $3.2/GB, and the price gets cheaper the more you buy. For example, the unit price drops to $2.5/GB at 10GB, and $2.3/GB at 50GB. Plus, new users get up to a 20% discount, regardless of the traffic quantity you’re purchasing.
You can also switch to our monthly subscription plan, where your first subscription unlocks a special $0.5/GB rate as long as you buy at least 10GB, and every renewal after that comes with a 10% discount.
With your account verified and your purchased traffic allocation showing on the dashboard, here’s how to configure your residential proxy on IPcook.
Step One: Configure and Generate Your Residential Proxies
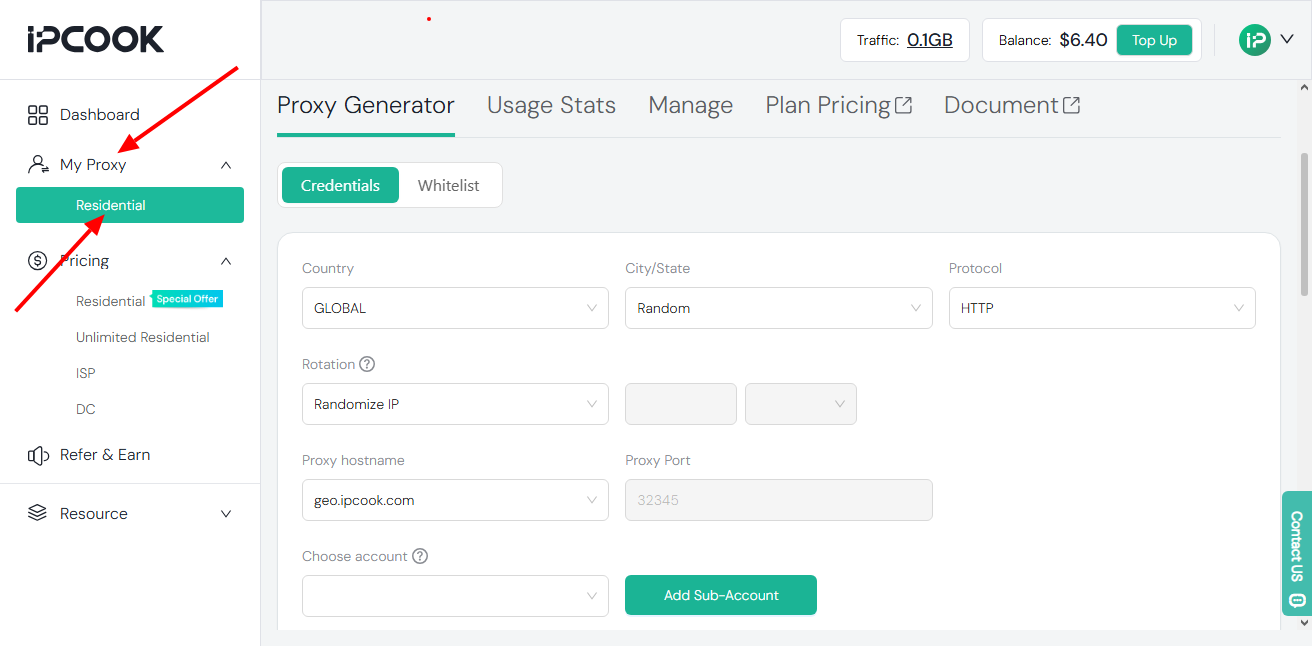
This is found on IPcook >> Dashboard >> My Proxy >> Residential. Here, you will see the proxy generator tool. Follow this sequence to configure your proxy:
- Choose a country, then a state, and then a city. For example, United States – Massachusetts – Boston.
- Choose between HTTP or SOCKS5 protocol. HTTP is recommended if you’re not highly technical.
- Pick an IP type between Randomized and Static IP. Randomnized IP change at random, and at random intervals, while a static IP can be set to remain static for up to 24 hours. A static IP is often the best choice.
- Leave the “Proxy Hostname” and “Proxy Port” the same.
- Create a new sub-account to assign the proxy to. (Yes, you must create a sub-account to assign any proxy you’re generating; you can always delete the account at any time). While creating the sub-account, you’d need to choose a username and password, which would become your proxy’s username and password.
- Now, choose the number of proxies to generate. You can generate up to 1000 proxies per sub-account.
- Make sure to download the proxies as a .txt document; that way, it’ll be easy for you to access them and fail over when one stops working. Below, I only generated 5 proxies for this review.
- Choose a country, then a state, and then a city. For example, United States – Massachusetts – Boston.
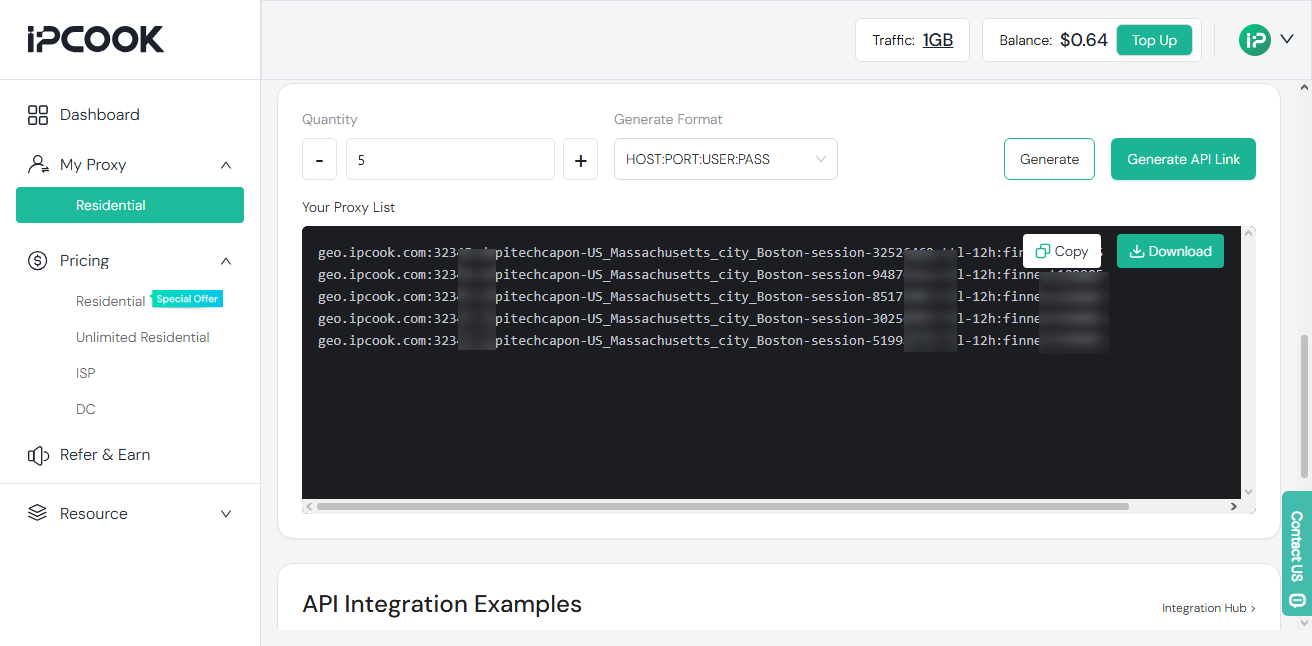
Step Two: Set Up Manual Proxy On Your Windows Computer
Now that your proxies are ready, the next step is to push them to where you’d need them. If you chose HTTP protocol during the configuration, you don’t need any 3rd-party tool to configure the proxies on your PC or even your phone. But if you chose SOCKS5, you’d need a SOCKS5 proxy client app or software to set it up; this is why I recommended choosing HTTP, especially if you’re not a technical person.
Back to setting up the proxy on your Windows PC, here are the steps:
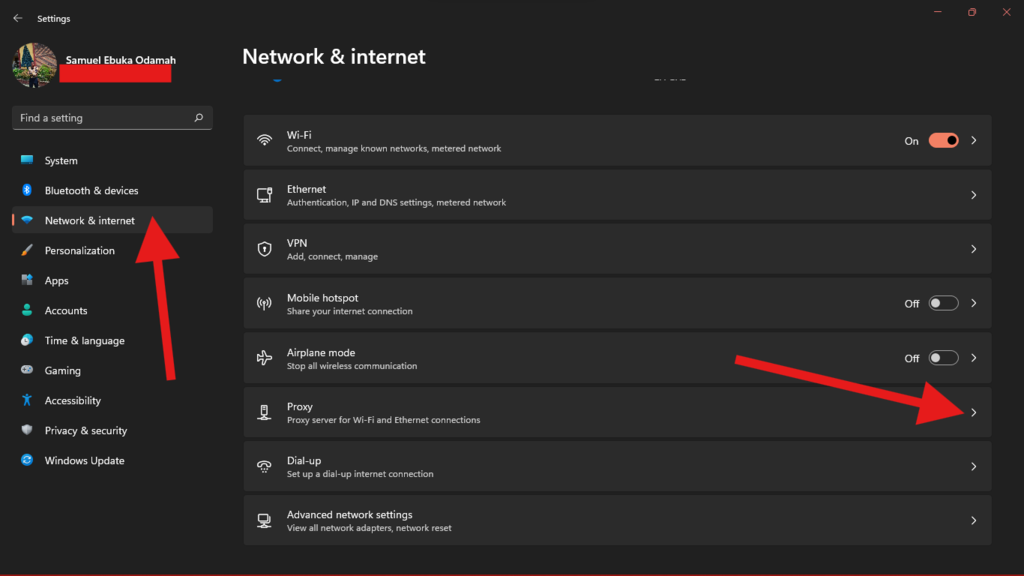
- On your Windows system, go to Settings >> Network
& Internet >> Proxy Settings.
- On the “Manual Proxy Setup” tab, click on the “Edit” button on the far right.
- On your Windows system, go to Settings >> Network
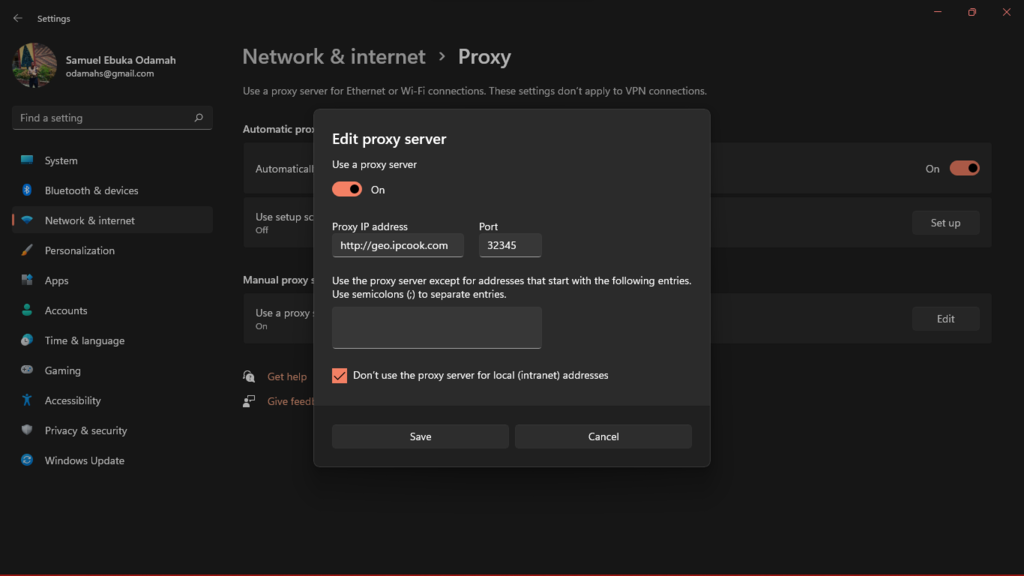
- Now, enter one of the many proxies you generated on IPcook. The proxy comes in this format: HOST: PORT:
USERNAME: PASSWORD.
- E.g: geo.IPcook.com:32345:dopitechcapon-US_Massachusetts_city_Boston-session-32526469-ttl-12h:finnestxxxxx.
- Where the
- Proxy IP address: geo.IPcook.com
- Port: 32345
- Proxy Username: The long string starting with dopitechcapon… all the way up to the colon (:) right before your password. (Note: yours would start with your sub-account’s username and not dopitechcap…)
- Proxy Password: finnest199805
- Proxy IP address: geo.IPcook.com
- You have to enter them correctly like this into the proxy setup on Windows. Although you only need to enter the Proxy IP address and Port on the Windows manual proxy setup page, the long username and then the password are to be entered when you get a prompt as you try to connect to the internet.
- Make sure to check the “Don’t use proxy for local intranet…” box; otherwise, local devices like your printers or networked computers would stop recognizing your PC, since the native local IP would be altered.
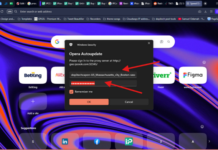
- Save and close the proxy setup dialog box. Immediately, you would be prompted to log in to the proxy you have configured, and that’s where you’d now input the username and password.
- So, in the prompt box, copy one of the proxies you generated and paste it. Remember, the one to copy as the username is the long string that starts with your subaccount username and ends with the duration you set for your static IP; in my case, it is dopitechcapon-US_Massachusetts_city_Boston-session-32526469-ttl-12h. The password is the last part of the proxy string: finnestxxxxxx. When you enter the username and password, make sure you check the “Remember Me” box so you don’t keep getting the prompt.
- Now, enter one of the many proxies you generated on IPcook. The proxy comes in this format: HOST: PORT:
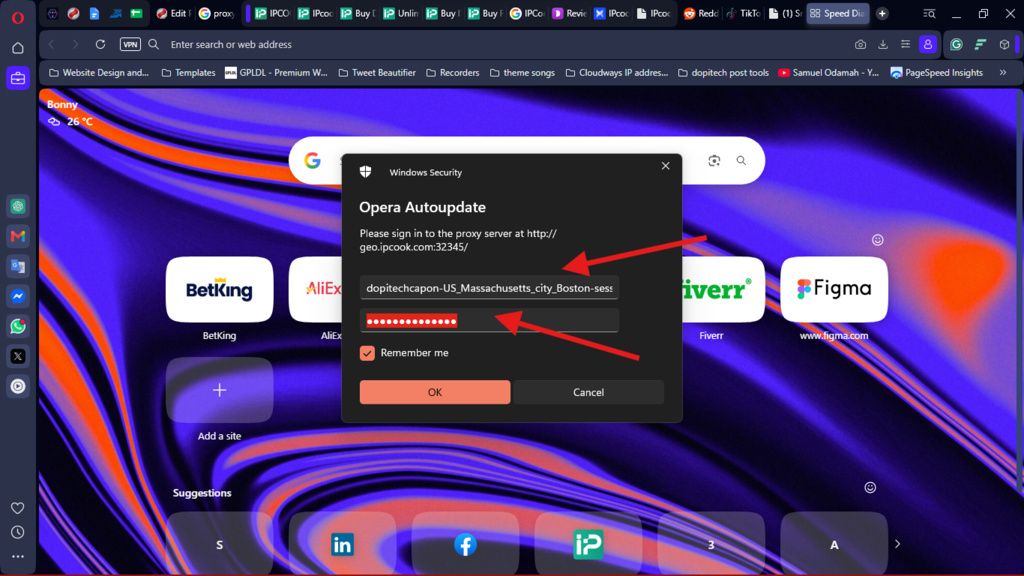
That’s it! You have set up your proxy. You can now open any browser on your PC and start browsing. If you get the username/password prompt again, it may be that the proxy you entered has gone offline, so you can copy another one and paste it into the username section and hit “OK” to save. You can toggle between proxies at random.
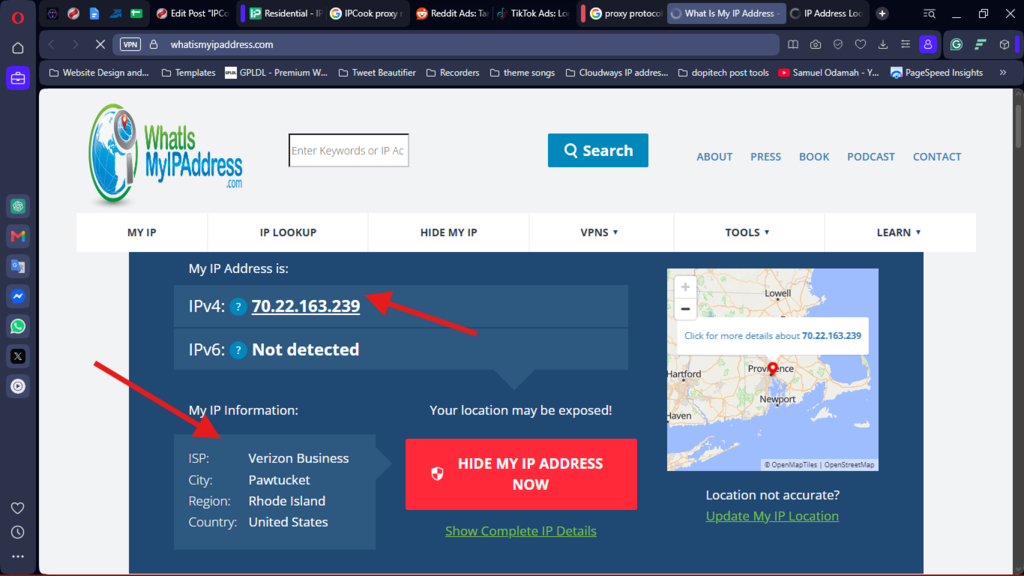
To confirm you have completed this setup successfully, use IP checker tools to see where your current IP is pointing. It should be pointing to the new country you selected in that IP generator tool. Mine shows Boston; meanwhile, I’m in Nigeria, currently.
My IPcook Review and Verdict
The residential proxy worked perfectly, and the setup was pretty straightforward, allowing for flexible choices. I thought the proxy might slow down my network speed, but it didn’t: My browsing speed remained consistent as usual.
Allowing up to 10 sub-accounts to be created and up to 1000 proxies per city are two of the most intriguing features for me. Also, the dashboard provides detailed, valuable information and lets you track your usage; You can allocate more traffic to a sub-account on the go.
In conclusion, IPcook‘s residential proxy works perfectly, and the setup is flexible. Plus, there are many adjustments you can make on the fly, if need be. You can use the proxy on a PC, mobile phone, MacBook, and any other device.