
When you press the power button, you’ll first see a black screen, then the MacBook boots properly; however, many Mac users have experienced scenarios where their MacBook got stuck on the Black Screen and never booted. If that sounds like a problem you’re facing with your MacBook, voila, you’re reading the right guide on how to permanently fix MacBook Pro black screen of death in just a few minutes.
The 5 Ways To Fix MacBook Pro Black Screen Of Death
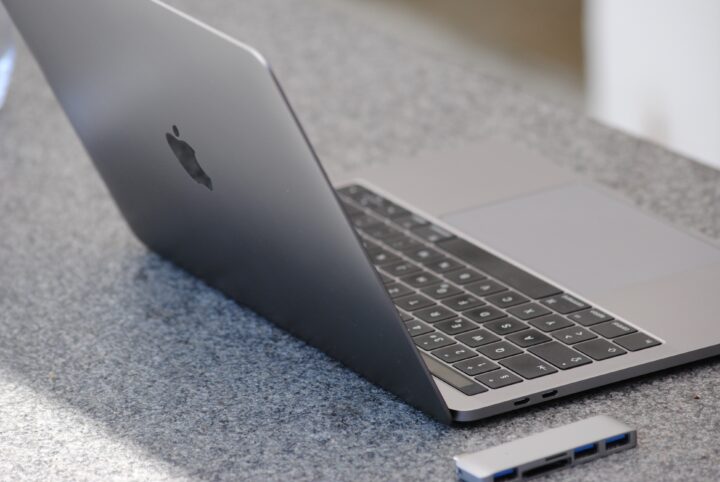
As frustrating as a black screen of death (BSOD) can be, sometimes the fix is a simple tweak, with nothing complicated to deal with. Other times, it calls for advanced troubleshooting. Whatever the case may be, these DIY tips will help you overcome the MacBook Pro BSOD challenge.
1. Hard Reboot the MacBook
Now, this is the simplest troubleshooting step to try out, and it should be your first shot before trying anything else. Press and hold the power button until the MacBook is forced to turn off, then turn it back on and wait to see if it passes the blank-screen boot stage.
If this doesn’t work, you could be facing a big issue, but nothing worth panicking about at this time; there are other simple troubleshooting steps to take.
2. Reset the NVRAM and SMC
Most of the time, when a computer system won’t boot, it could be one of the connected accessories causing the hard boot; it could be an external keyboard, mouse, USB drive, or hard drive. So, start by disconnecting all externally connected peripherals, then try this boot sequence to reset the NVRAM.
This especially works if the blank boot screen is accompanied by a lit-up Escape key and Caps Lock, along with the trackpad being clickable.
- Forcefully shut down the MacBook.
- Boot it back up by pressing the power button, then immediately press and hold the Command + Option + R + P keys at once; hold them down until the Apple logo appears (in newer MacBooks); in older Intel Macs, the startup chime will sound twice.
- The computer should boot as normal afterwards.
After the reset, check your system settings, as sound volume, display resolution, and startup disk selection may have reverted to defaults.
Resetting the SMC
The System Management Controller (SMC) manages power-related behavior, including the power button, battery and charging, fans, and lid open and close behavior, while NVRAM stores certain startup and display settings. Interestingly, Apple says the SMC resets automatically on Macs with Apple silicon: you’d only need to plug the Mac into power, restart or shut it down, and then turn it back on.
If that doesn’t seem to have worked, shut the Mac down and reboot; this time, hold down the left Control, left Option, and right Shift keys at the same time. Keep holding those keys for about 10 seconds, then release. Wait a few seconds and press the power button to start up.
3. Boot in Safe Mode
Now, this is where it starts getting advanced. Booting into Safe Mode means your MacBook boots with the default system software it came with, disabling third-party apps, extensions, and non-essential startup processes. If you try Safe Mode and your Mac does actually boot successfully, then you’re facing a 3rd-party software conflict that’s stopping the system from booting regularly.
How to Boot into Safe Mode for Apple Silicon Macs (M1, M2, M3, M4, M5):
- Shut down the Mac completely.
- Press and hold the power button until “Loading startup options” appears.
- Select your startup disk.
- Hold the Shift key, then click Continue in Safe Mode.
- Your MacBook should restart and show “Safe Boot” in the menu bar at the login window.
For Intel-based Macs:
- Shut down the MacBook
- Power it back on and immediately press and hold Shift until you see the login window. You may see the login window twice.
- If this worked, “Safe Boot” should appear on the menu bar.
Note: If Safe Mode boot worked, then what’s stopping your Mac from booting properly is a third-party app. In this case, you have to uninstall all 3rd-party apps you had installed recently (right there in Safe Mode), and then reboot the system.
4. Run Apple Diagnostics
Your next option if all those above didn’t work is to run a diagnostics test; you could be facing a corrupt firmware issue or a critical hardware issue. Apple Diagnostics tests your Mac’s hardware and gives you a reference code if it finds a problem. Leave external hardware still connected: keyboard, mouse, display, Ethernet (if used), and power.
On Silicon Macs:
- Press and hold the power button until startup options load and you see Options; release it, then press and hold Command-D until the Mac restarts.
On Intel Macs:
- Turn on the Mac and immediately hold the D key (or Option-D if only D doesn’t work).
Note: Starting with macOS Tahoe 26 and later, Apple says you’re asked to choose a specific diagnostic to run, instead of the automatic full scan done in older versions.
5. Update Firmware or Contact Apple Support
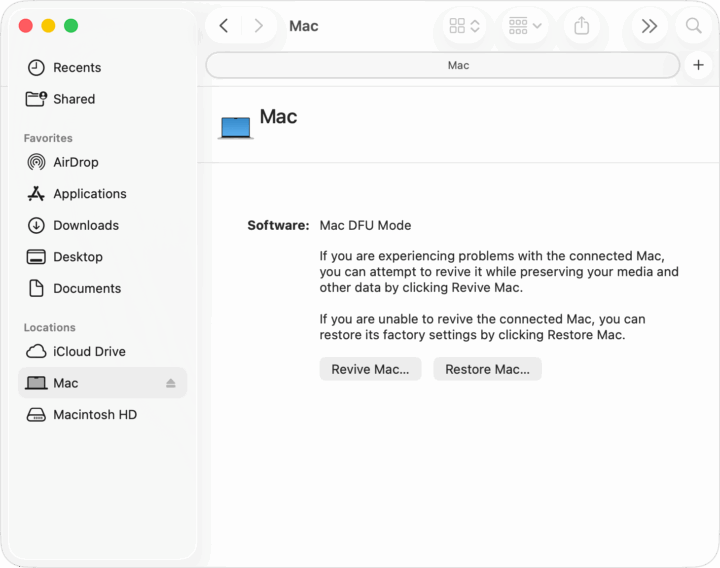
For this one, you’d need a second Mac and a USB-C cable, and your black-screen Mac has to be put into DFU mode. You can “Revive” or “Restore” a MacBook’s firmware. “Revive” is when you update the firmware and recoveryOS without erasing your data. “Restore” updates the firmware, then erases the Mac and reinstalls macOS, so use it only as a last resort, and mainly if your files are backed up or expendable.
Procedure:
- Plug the USB-C cable into the correct DFU port on the affected MacBook and connect the other end to the host Mac (the 2nd MacBook that’s working).
- Now, enter DFU Mode on the affected MacBook:
- Shut down the Mac, press and hold the power button for 10 seconds.2.
- Press and release the power button once.
- Immediately press and hold these four keys together: Left Control (⌃) + Left Option (⌥) + Right Shift (⇧) + Power Button.
- For Apple Silicon: Hold for about 10 seconds, then release the three keyboard keys, but keep holding the power button for another 10 seconds until a DFU window appears.
- For T2 chip models: Hold the keys for about 3 seconds until the DFU window pops up.
- In DFU mode, on the problematic Mac, open Finder or Apple Configurator window showing the DFU device icon.
- Select “Revive Mac,” then click Continue.
- Wait for the progress bar to finish.
- This will update your firmware and recoveryOS without erasing your personal data.
- Your MacBook should restart automatically once done.
If Reviving didn’t work, then try “Restore.” The procedure is the same as the one above, and the MacBook should reboot after the progress bar completes. Apple provides more details regarding these two actions on its support page.
What More?
One of these suggested Mac BSOD fixes should be able to get your MacBook booting back properly, but if none was able to do it, then you should reach out to official Apple Support or visit one of their verified repair stores in your local region. If this tutorial has helped you in any way, we’d love to know which one in the comments.